Using Curves to Create Vases in Blender 3D

In this article, we will be creating vases using the 3D software Blender. It's a free software that can be used to create 3D models, animations, digital sculpting, movies editing, and VFX. You can download the software from this Link and install it.
The process of creating a vase is very simple. First, you have to add a curve to your scene, add a modifier to that curve, change some settings, and you have a pot. Once the process is clear, you can create it within minutes. So let's get started!
- Adding shapes to a scene/ viewport:
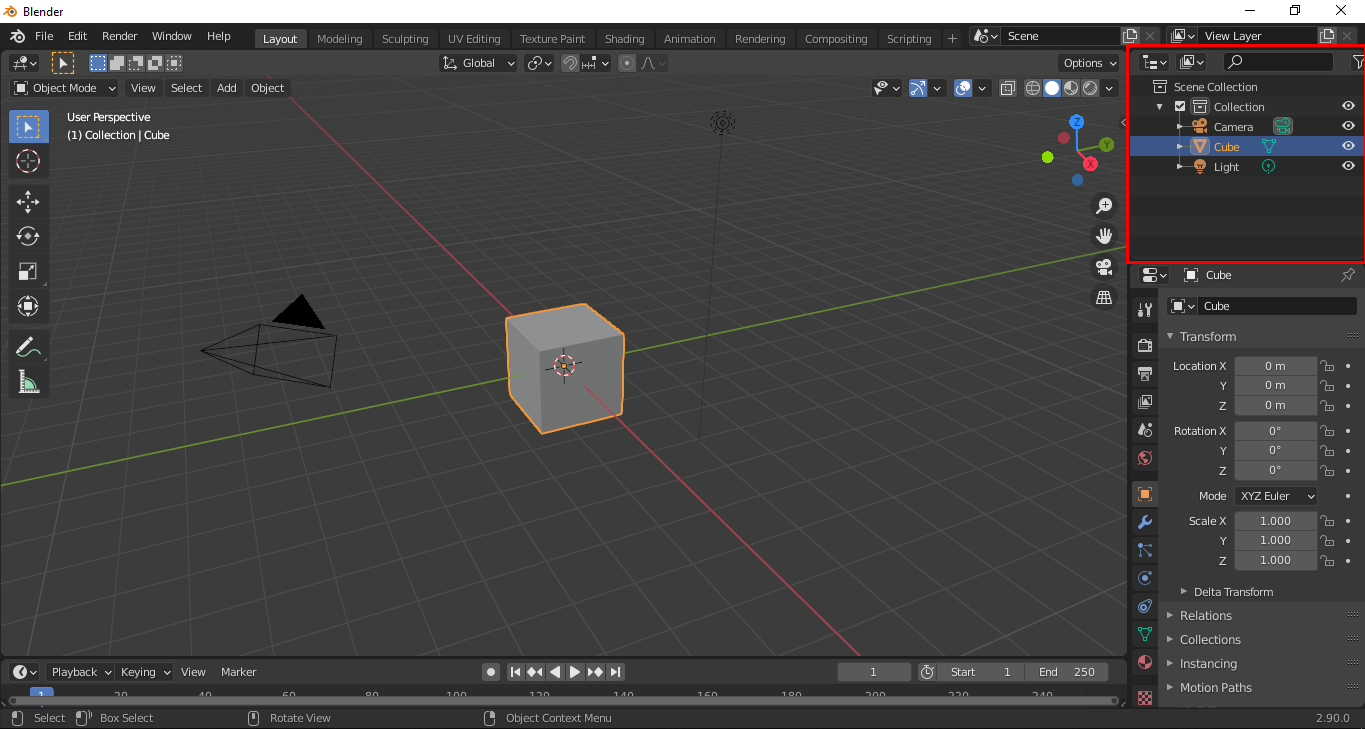
Once you have started Blender, you will be shown the splash screen where you can find
different workspaces. Just select General or click outside of the splash screen. The first
thing you will see is a cube added to the scene. Apart from that, you will have a camera and a light. You can find all the objects added to your scene in the top right in the hierarchy panel and just below that, is the setting panel.
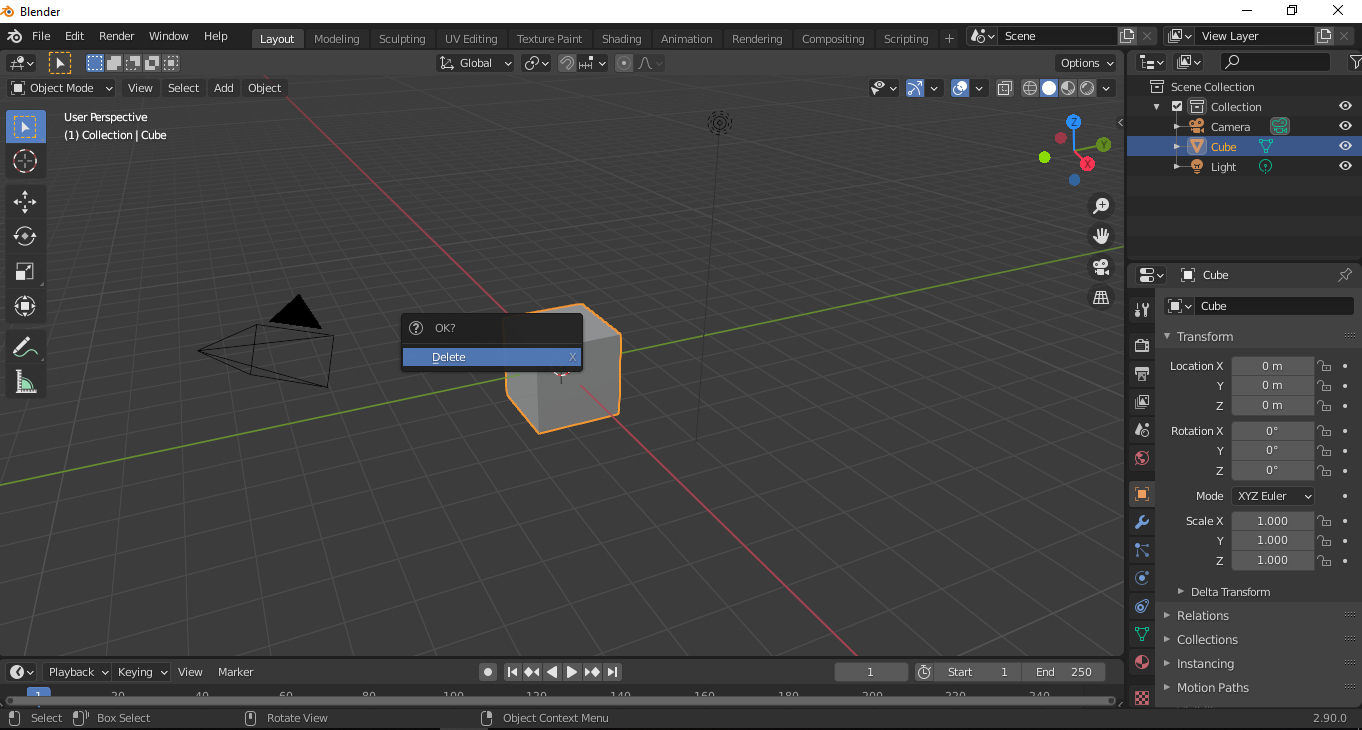
You can click and hold the middle mouse button / scroll wheel to move around the viewport. Scrolling the wheel will zoom in/out of the viewport. You can delete the cube by clicking on the “X” key and confirming delete.
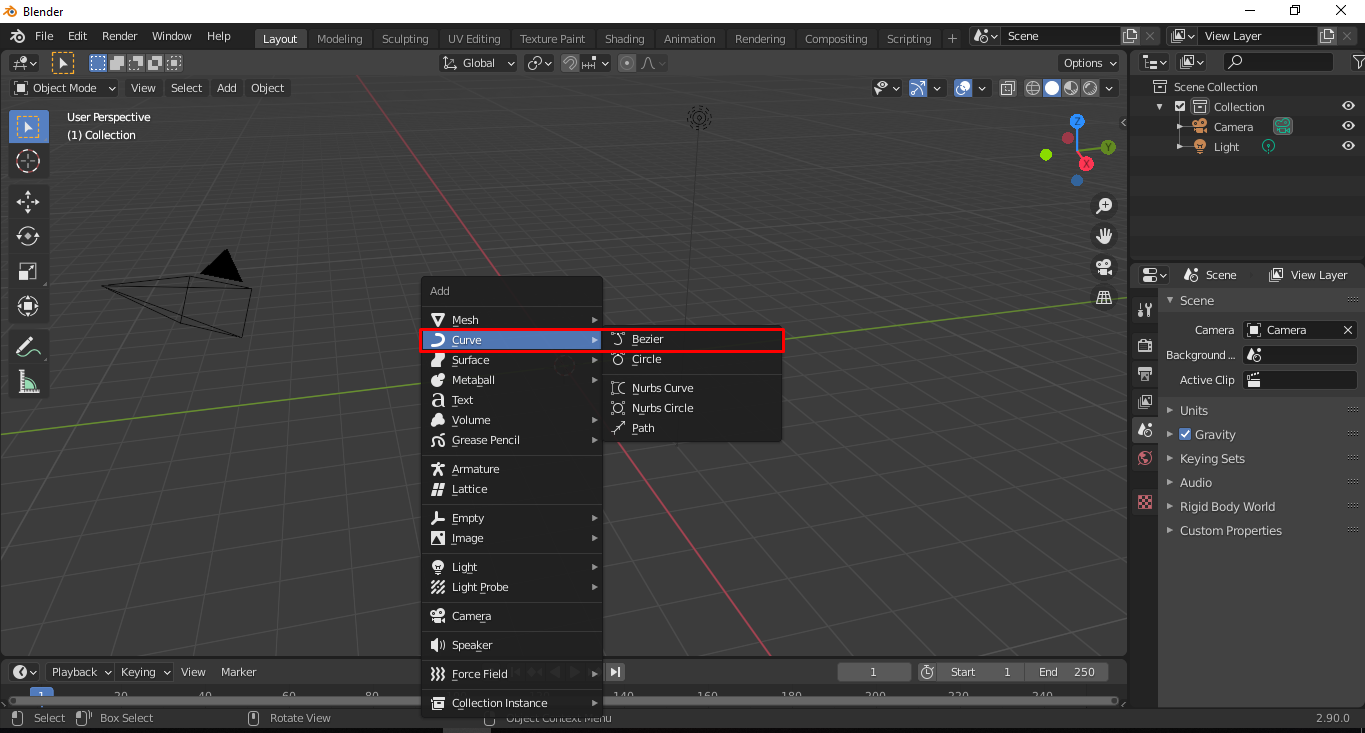
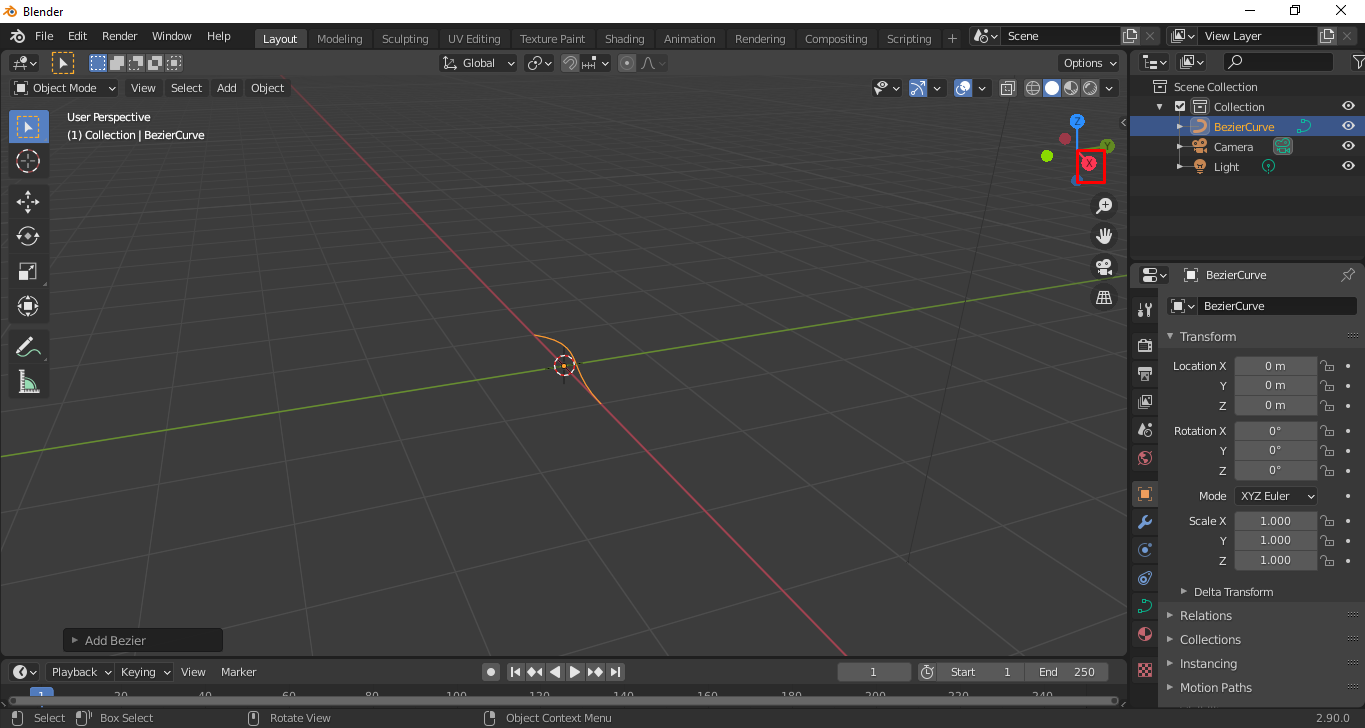
Once this is done, add a curve which is required for creating the Pot
To add a curve, press SHIFT + A keys and select the Bezier Curve.
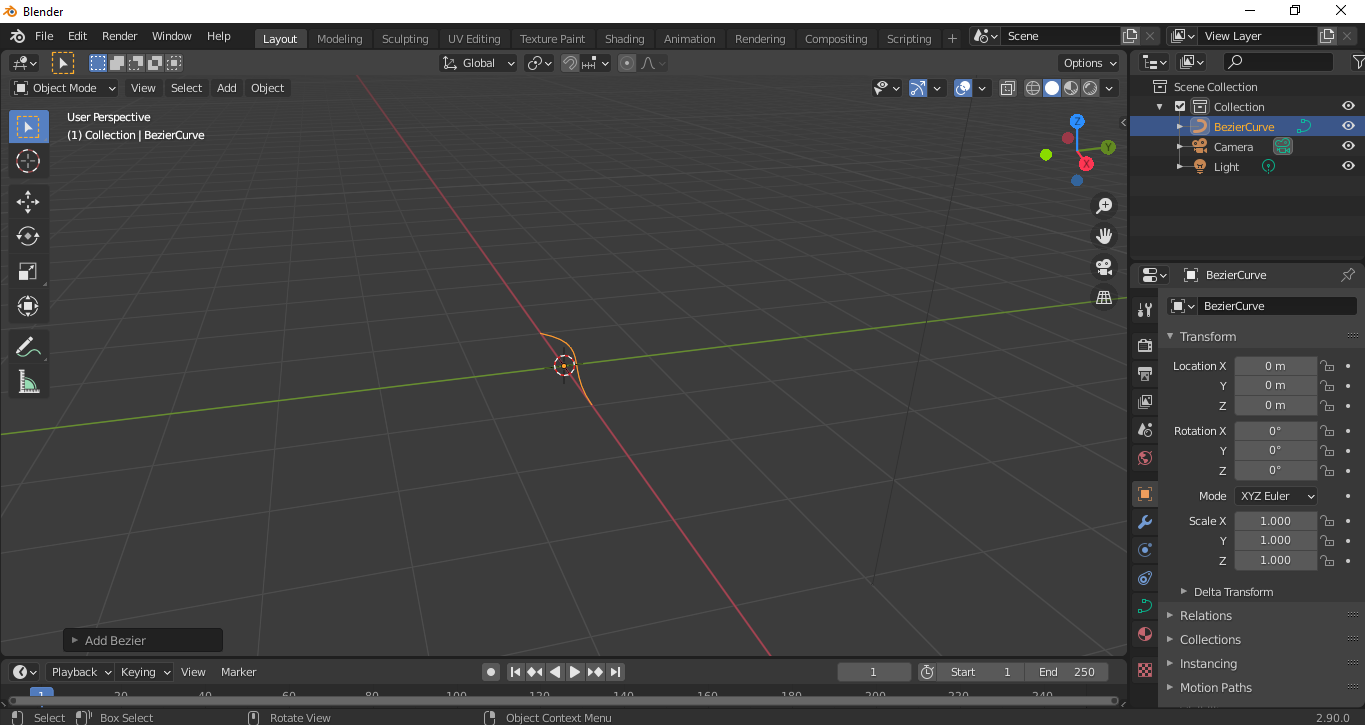
This will add a Bezier Curve to the viewport. And the viewport will look like this:
Now we have to rotate the curve vertically. To do that, first we have to switch to front view by clicking NUMPAD 1 or x on the right corner.
Now with your curve selected, go to object panel and type -90 in the Rotation Y
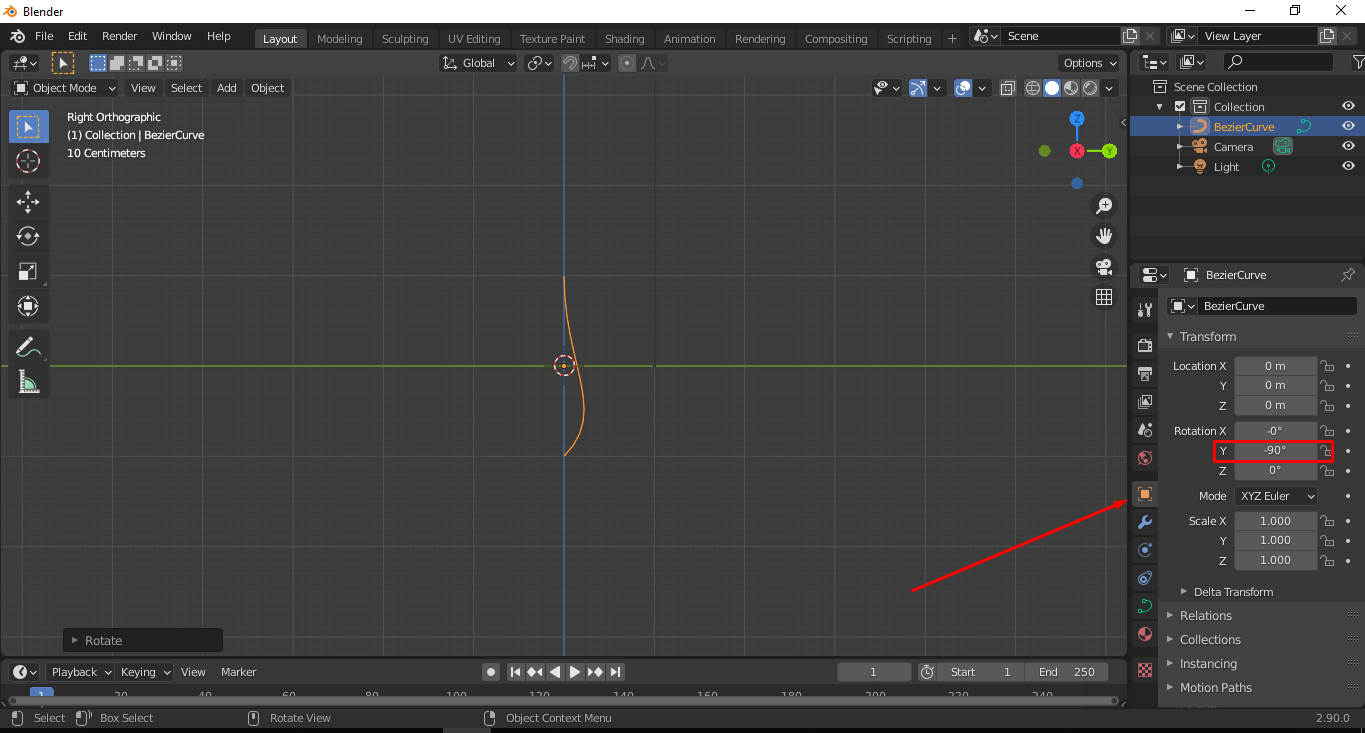
Once done, your scene should look like this. Now for the fun part, we will be adding a modifier to our curve and give it the shape of a pot. On the right hand side, select the modifier options.
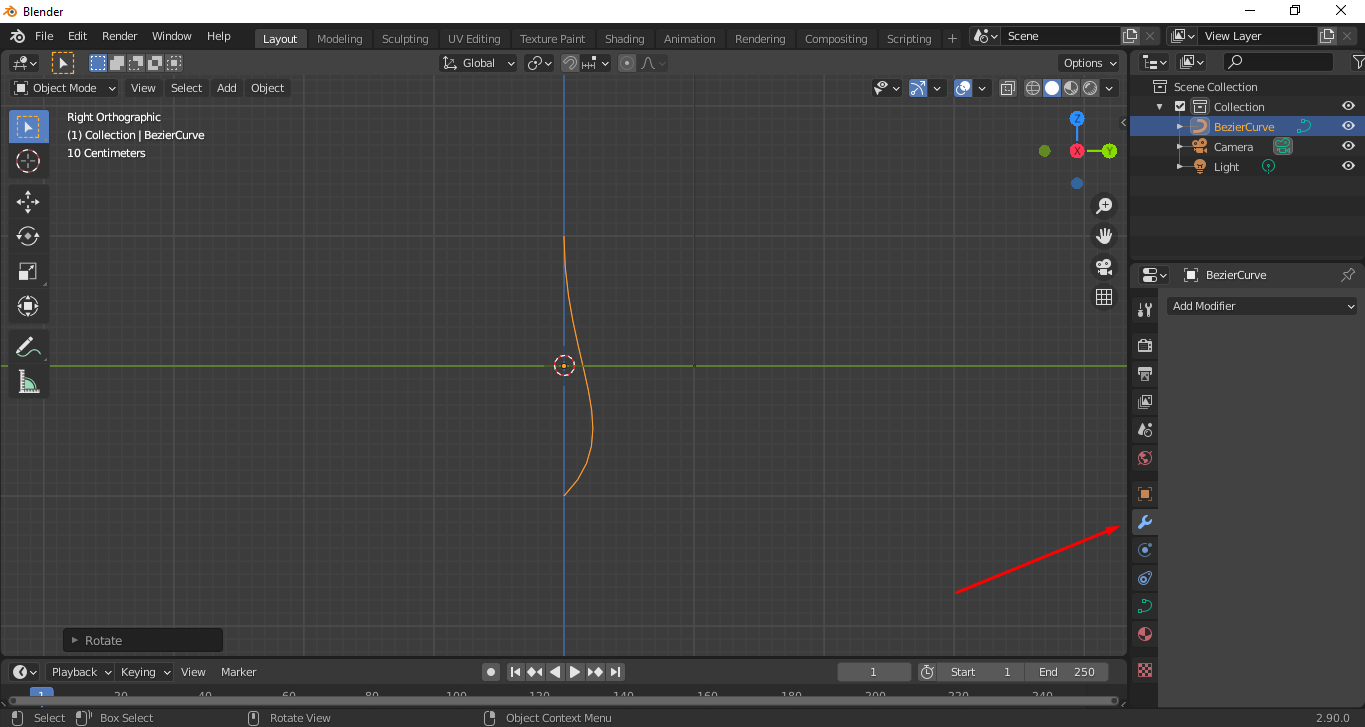
Click on Add Modifier and select “Screw”

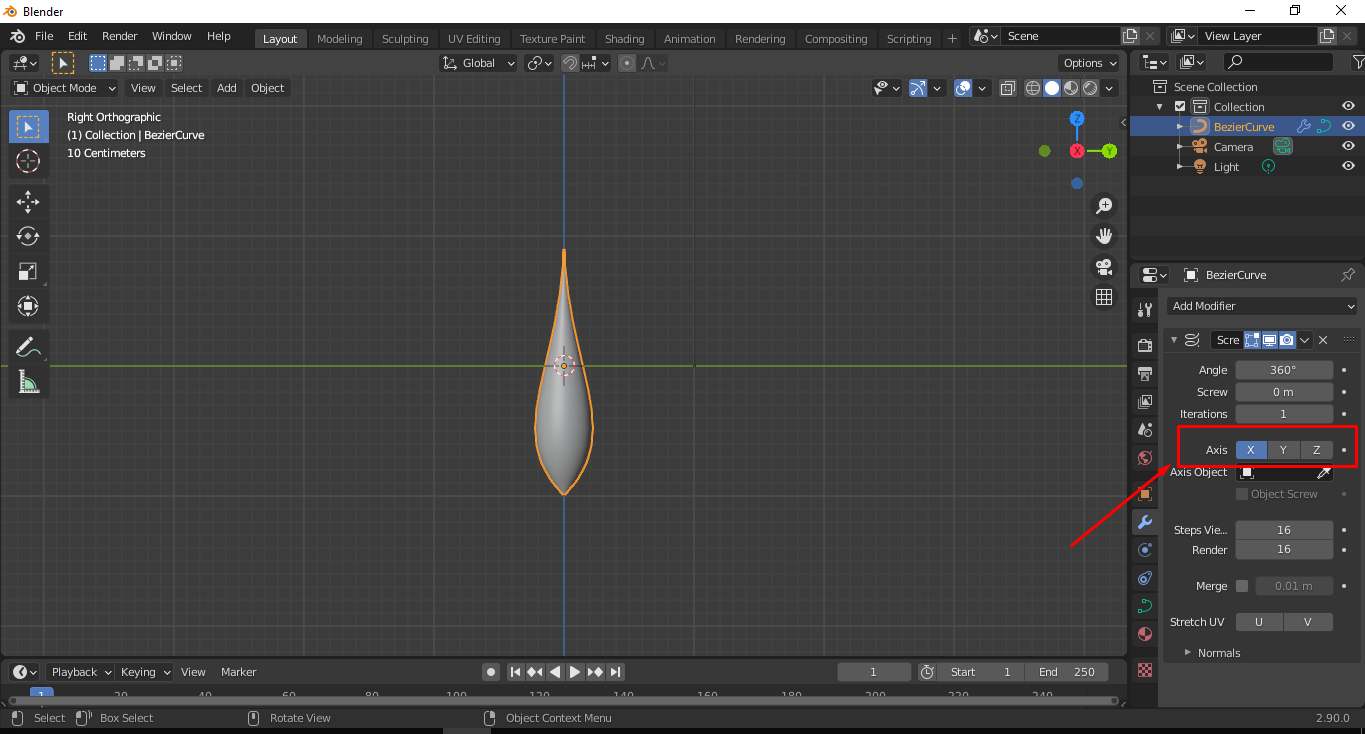
Once you add it, your curve will look like this. Currently it is affecting the z axis, and we have to change it to X.
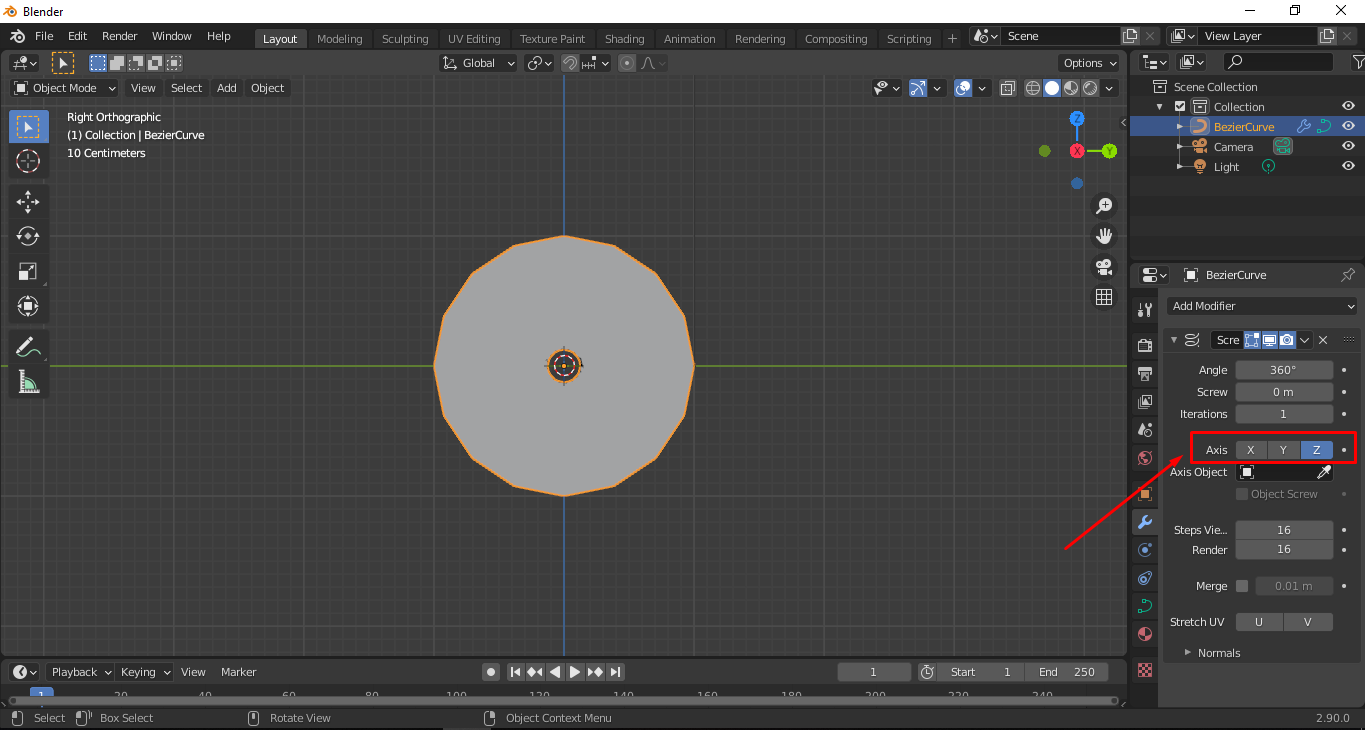
Select the X from the axis option and your scene will look like this:
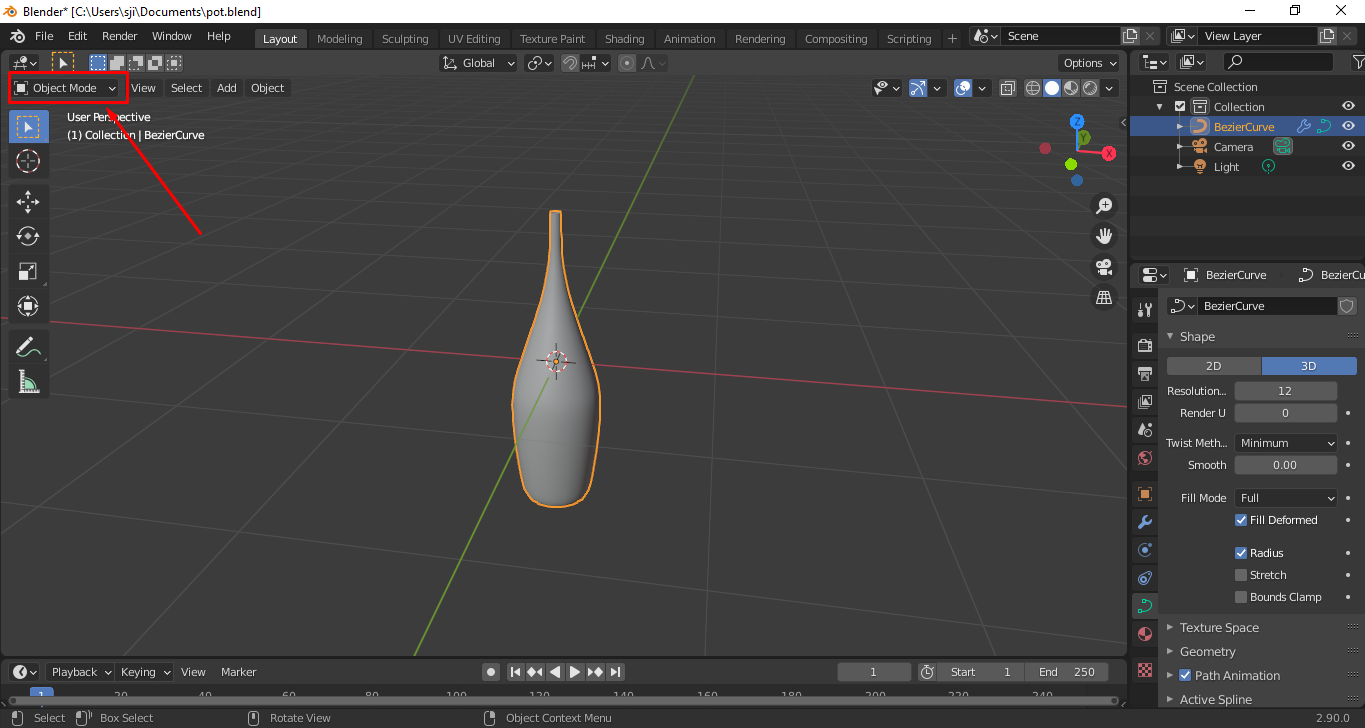
Once this is done, we have a basic shape for the pot. Now we have to add more geometry so that it looks like a pot. Select the object and click the TAB key to go into edit mode and it should look like this:
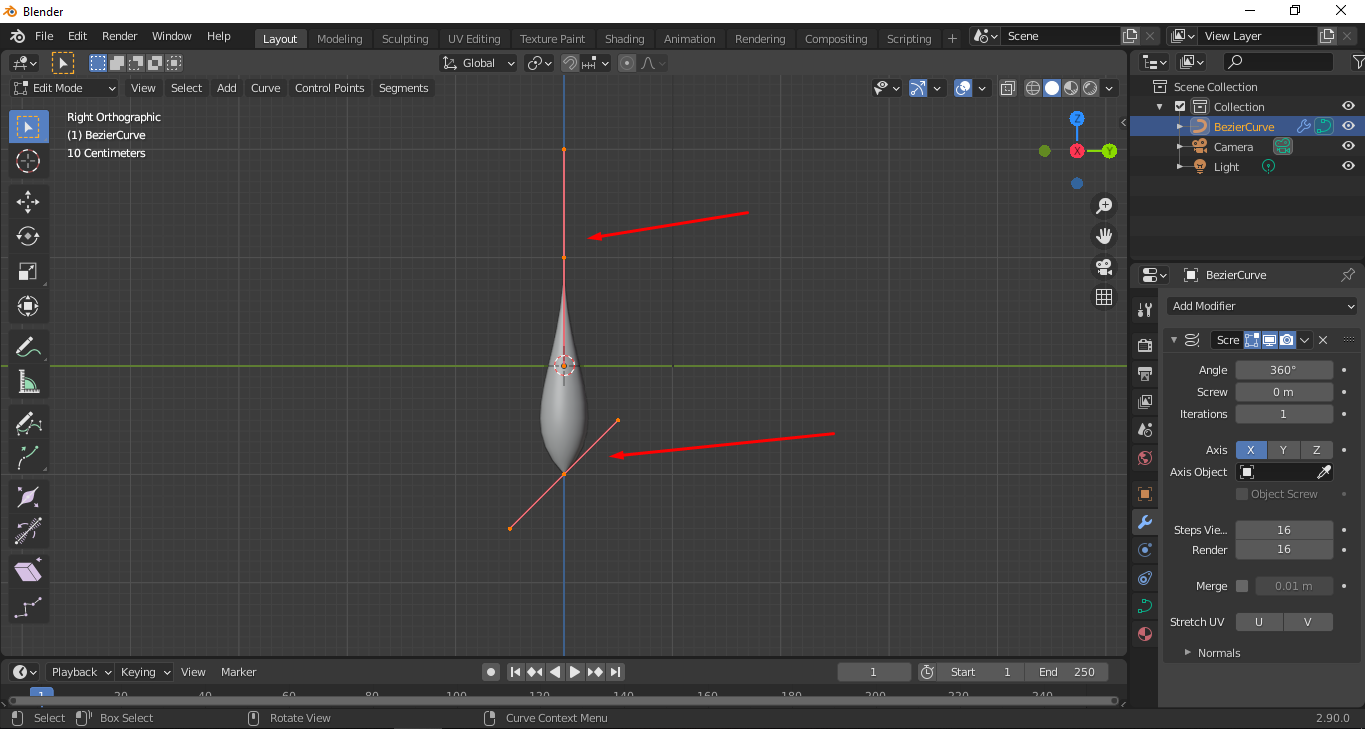
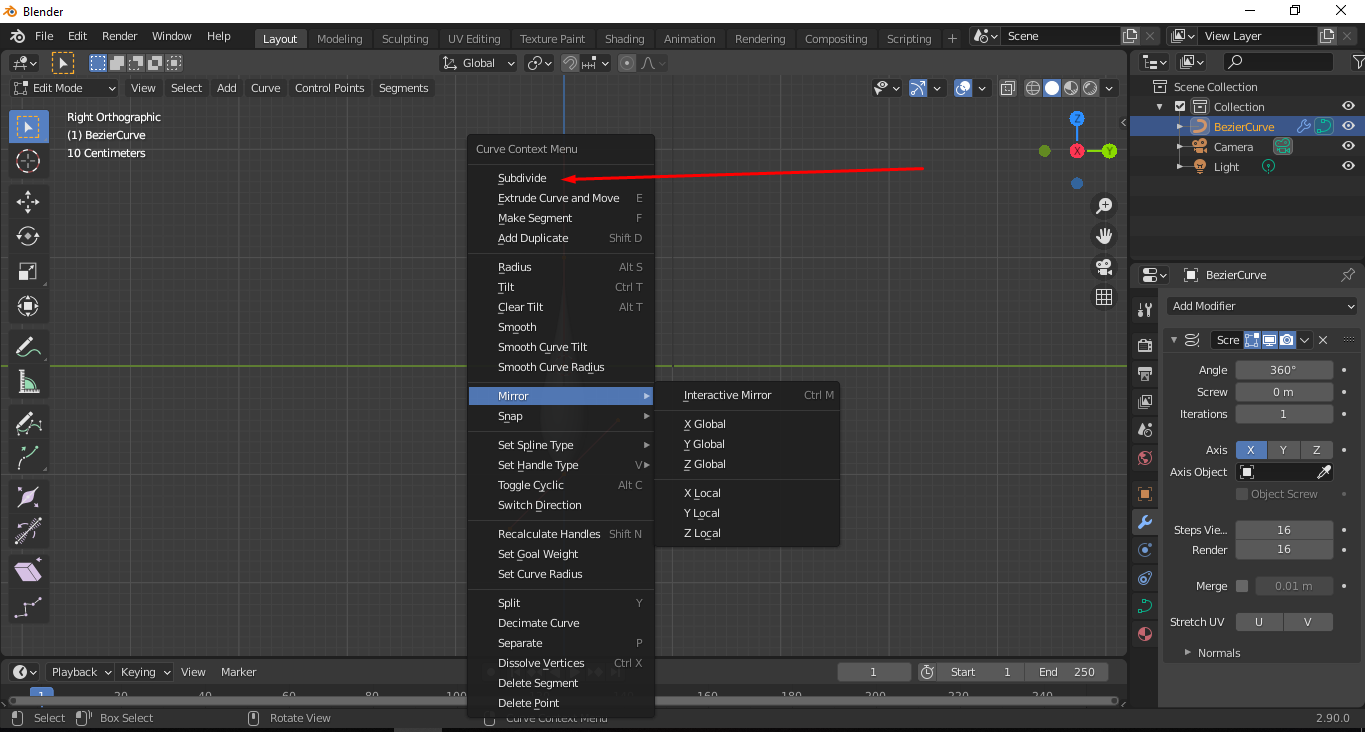
The two red lines are handles that are used to move the curve. Now we only have two handles, but we need more so that we can define the shape better. To do that, click on the A key, which is used for selecting everything. In Edit Mode, it will select all the parts of that object. Right click and select Subdivide.
Click on the Subdivide Option in the bottom.
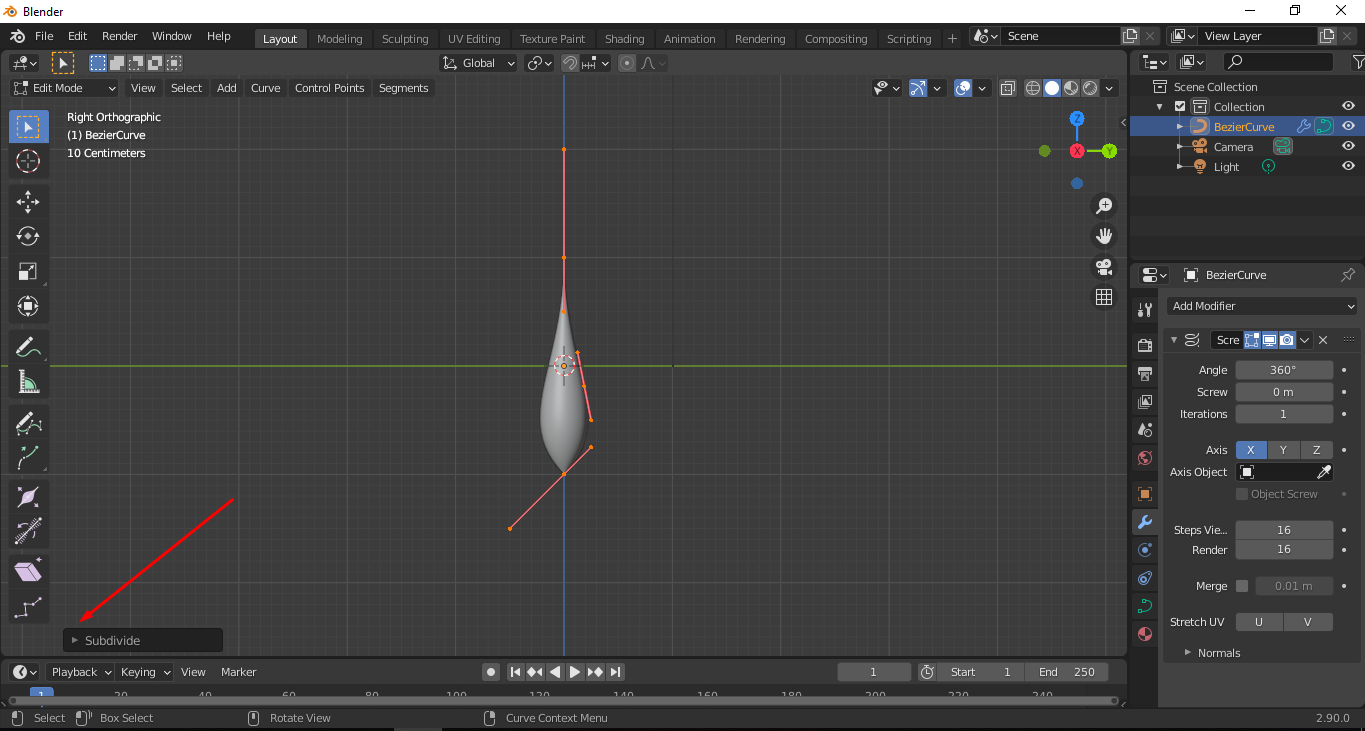
This option will go away if you click anywhere in the scene. So once you select the option, don't click anywhere else.
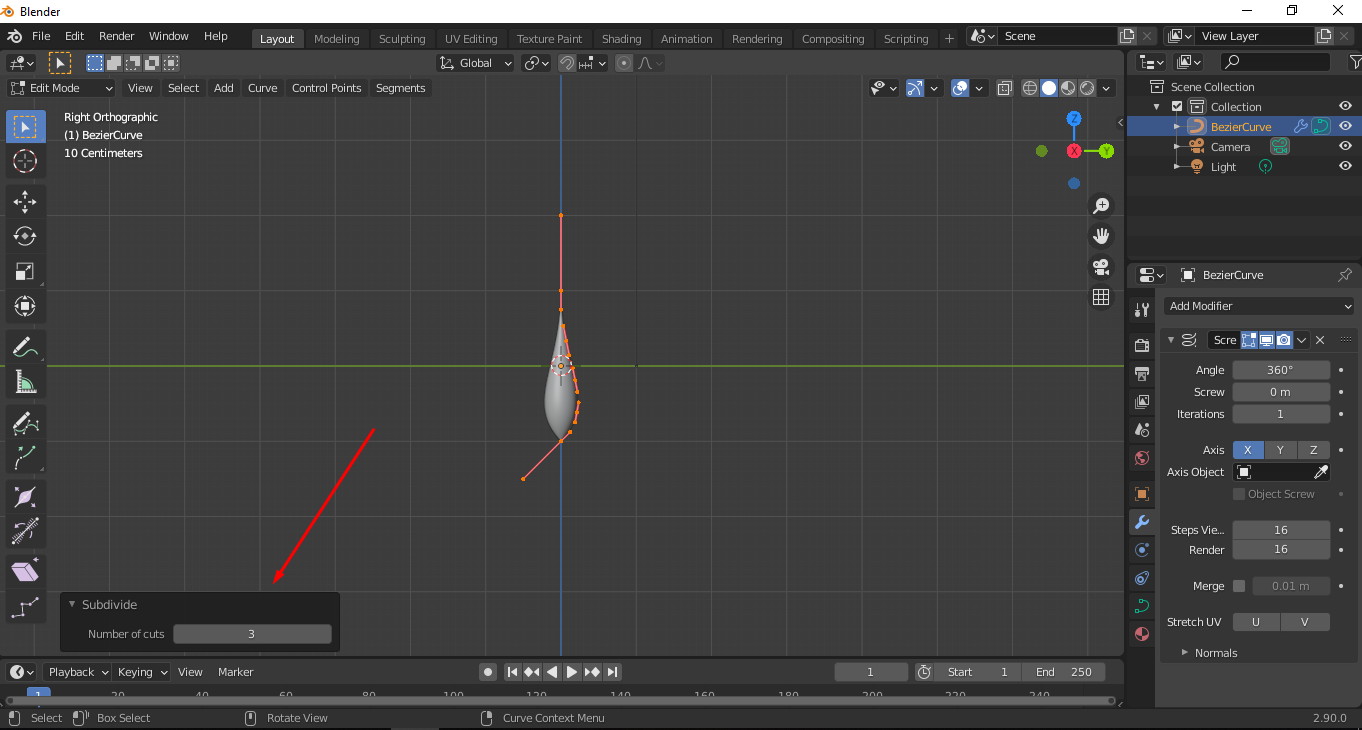
For our case, 3 divisions will be enough. Now we just have to move the handles to give our pot its shape.
First, click the bottom handle and rotate it horizontally.
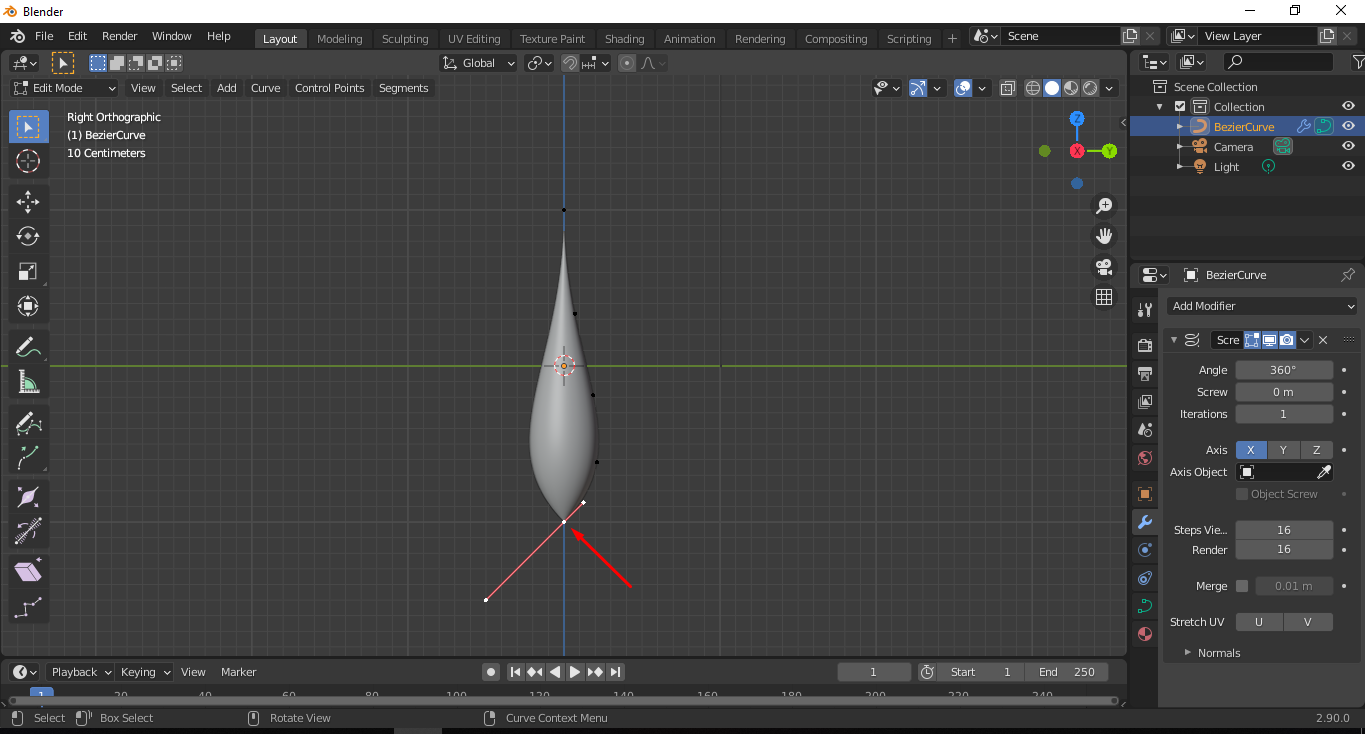
To do that, click on the handle and click on R. This will enable the rotate option for the handle and start moving your mouse.

Once the handle is horizontal, left click to fix it to that position.
Now we will move the remaining handles to create shape.
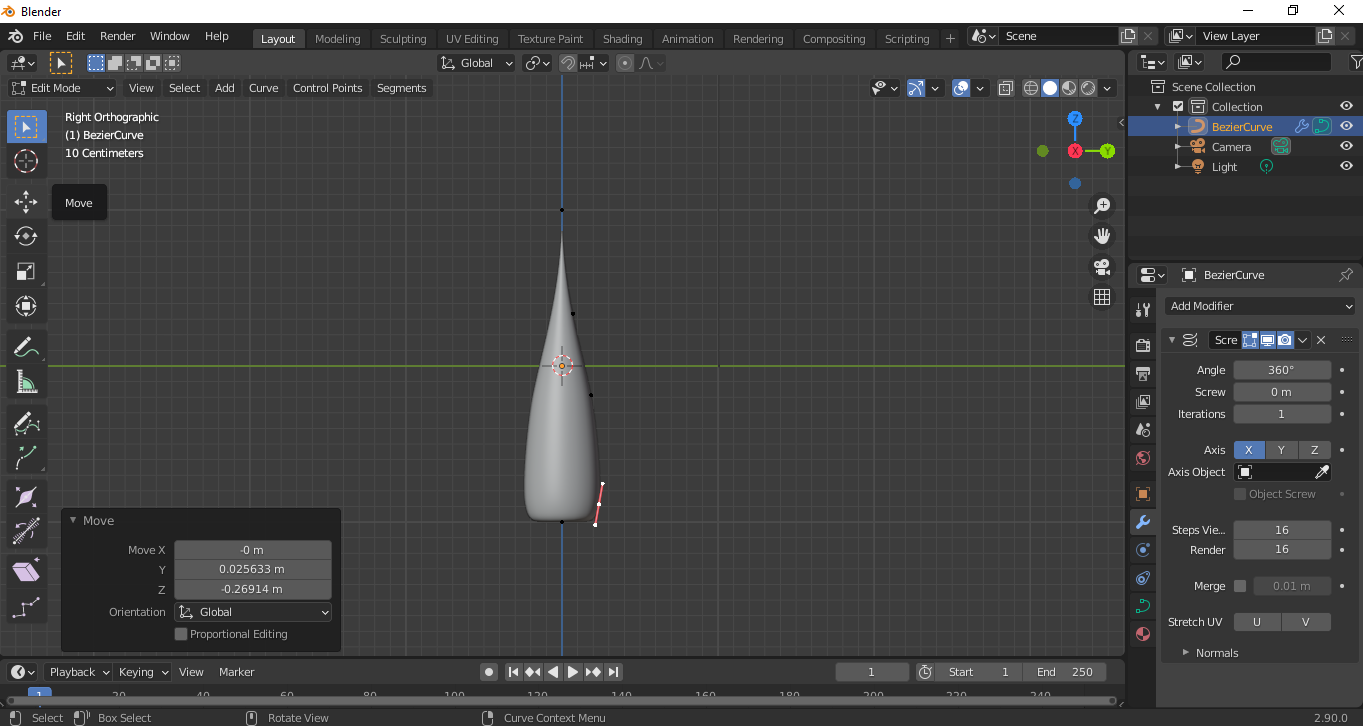
Select the task handle and move it to give it shape. Click on “G ” on the keyboard and that will move the handle. Once you are ok with the position and shape, left click to fix it to that position like this by moving the other handles.
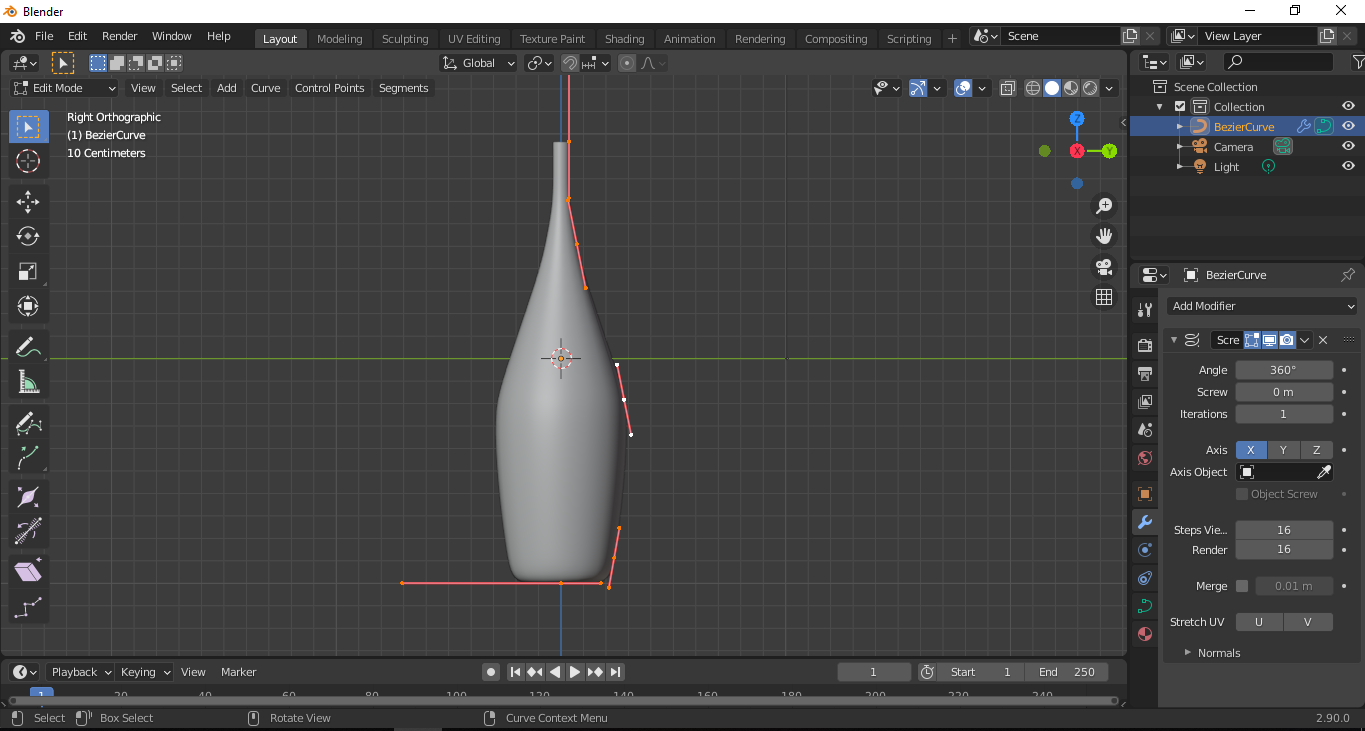
Move it to the desired position. This is how I moved them onto my modal.
Now let’s add some colors to the model.
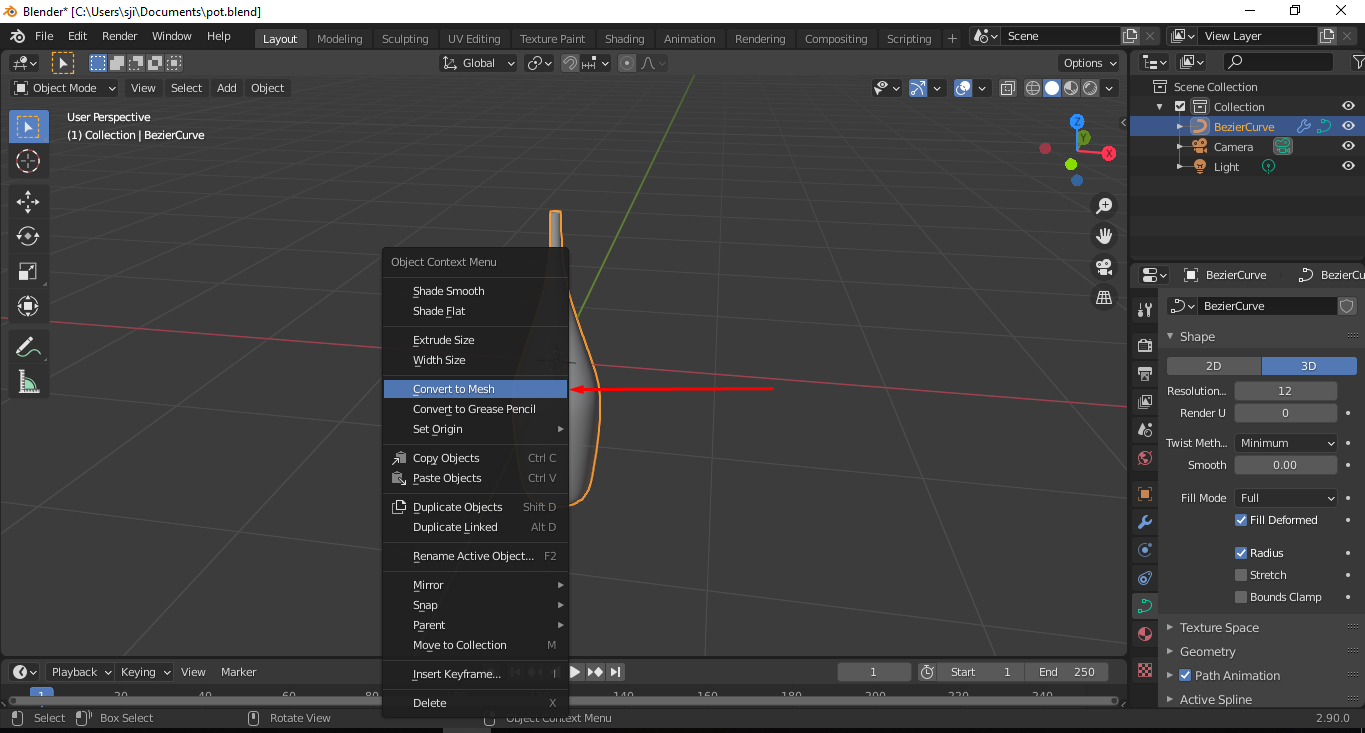
- First click on “TAB” to go to object mode. You can see which mode you’re working on here:
Now select the model and “ Right click “ on the mouse and you'll see option for the object. Click on “convert to mash”.
Now to add colors, click on the ball icon on the right hand side. This will open the Materials Panel.

Once that’s open, click on the “NEW” option.
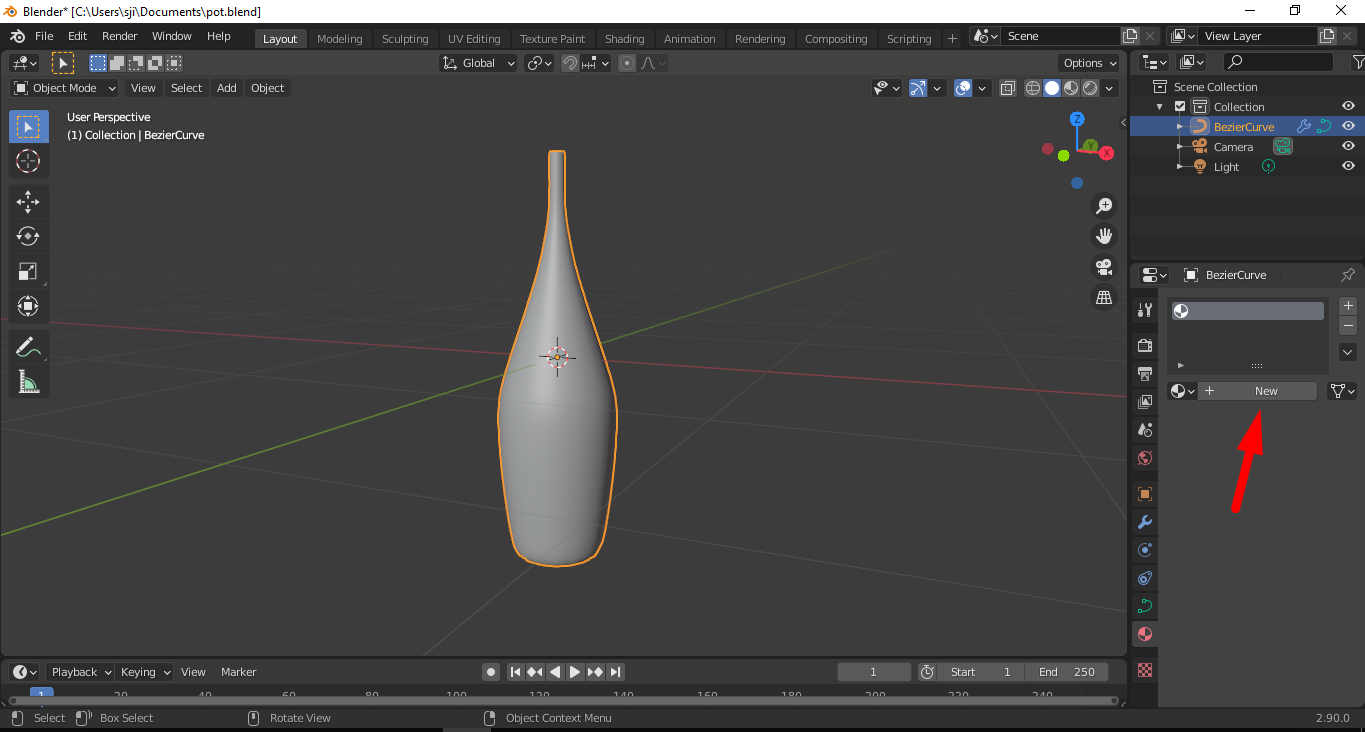
This should add a new material for the object.
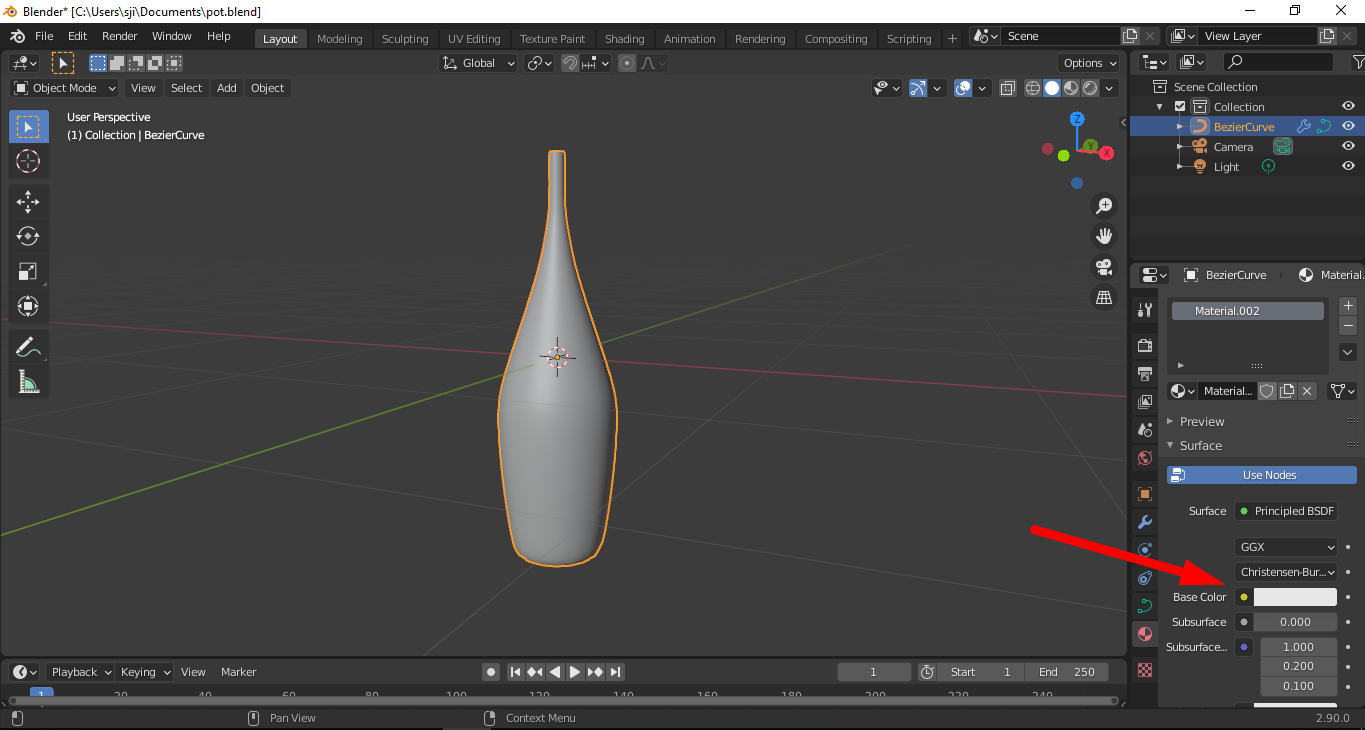
You can change the color by clicking on the base color. To view the color added to your object, click and hold the “Z” key and select the Material Preview.
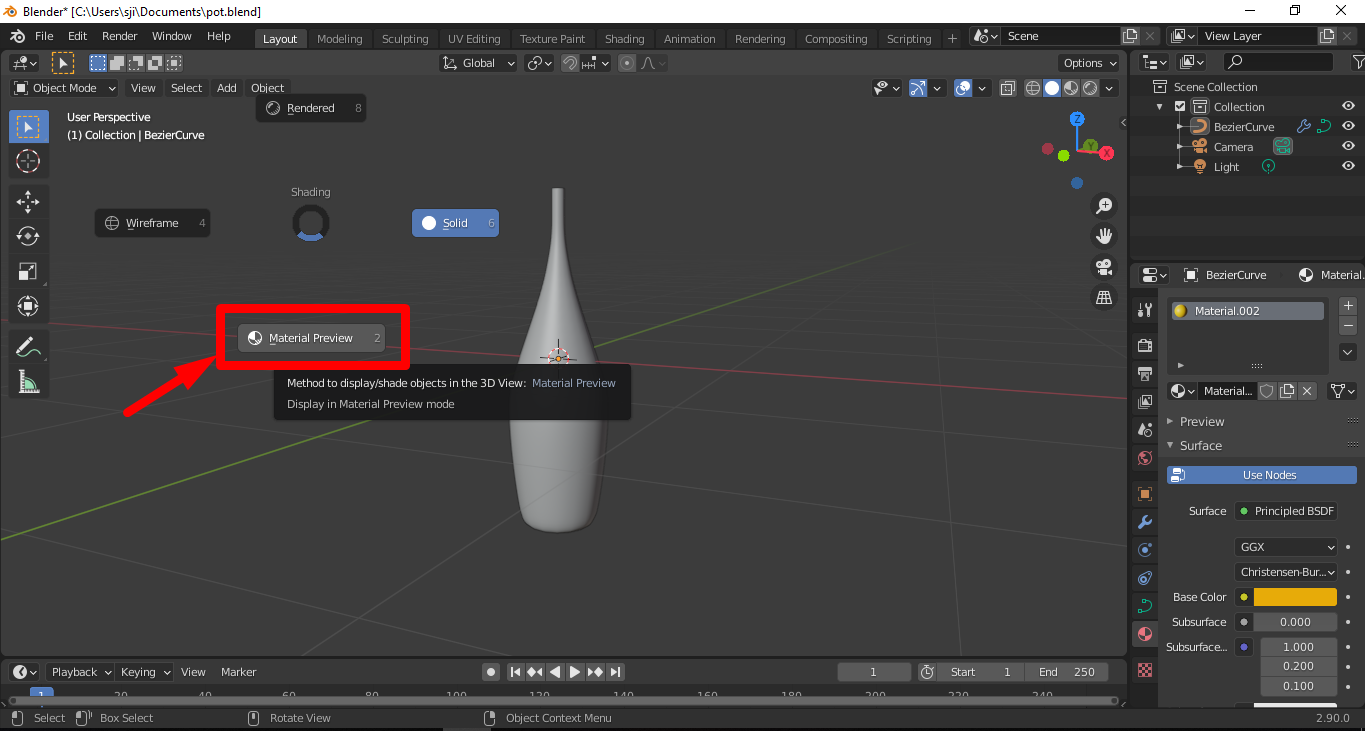
Now you should be able to view the color of your object.
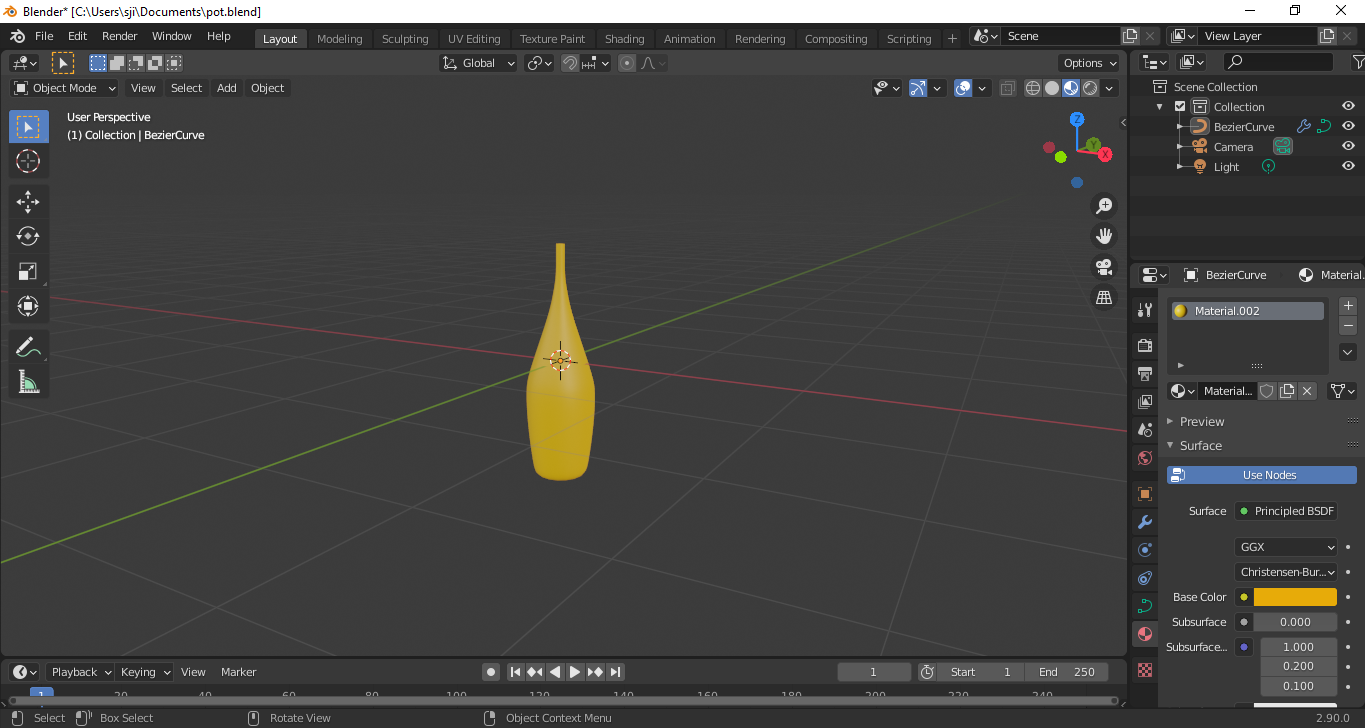
Use the middle mouse button to move around the scene. Make sure the pot is in your view.
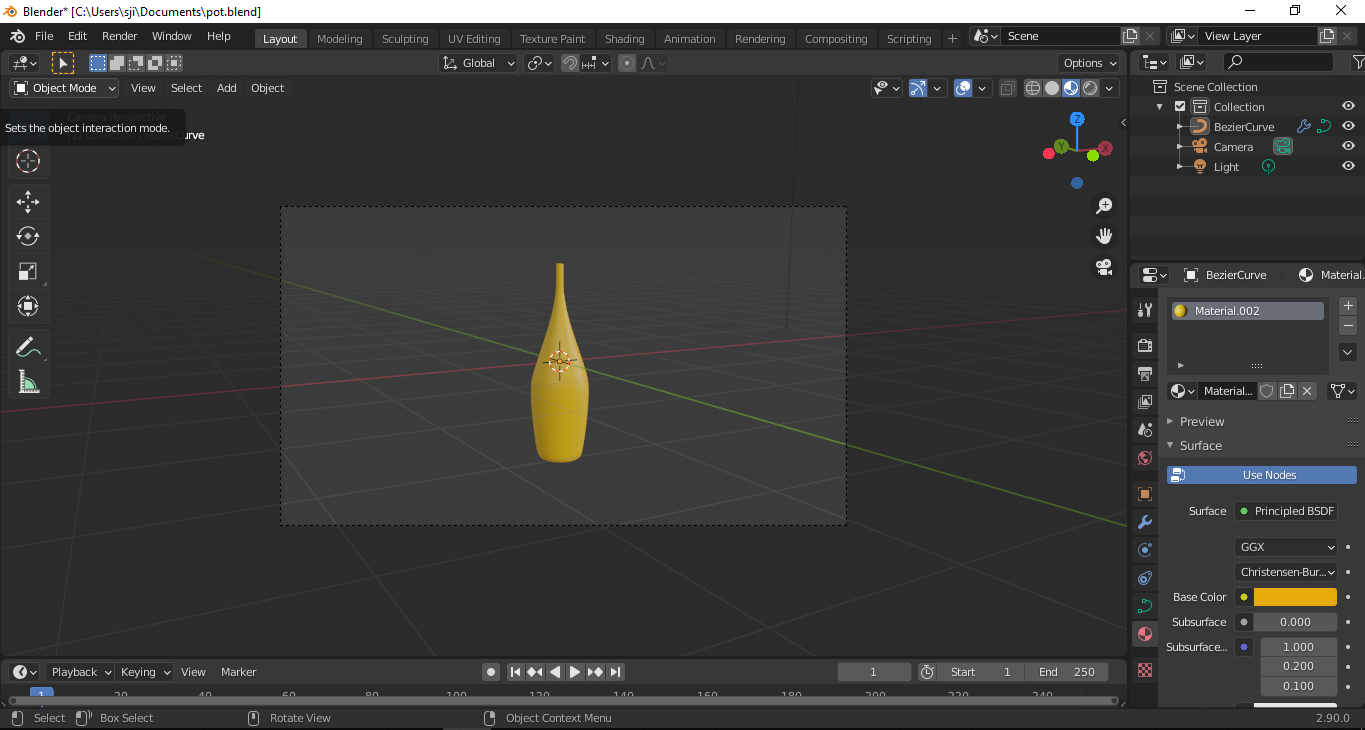
Once happy with the position, click “CTRL + ATL + 0 ”. This will fix the camera to the object from the view.
Now to render the scene, just select the Render option and then select the Render Image.
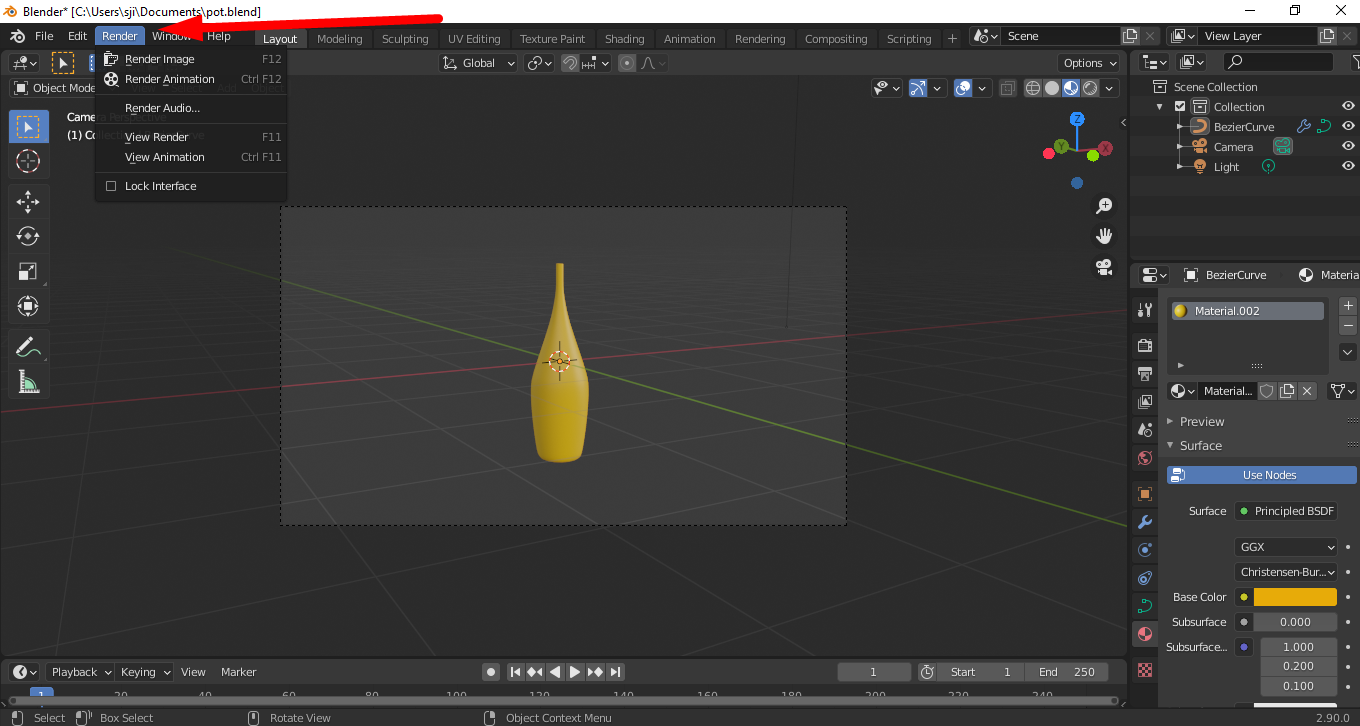
Once done, the render process will start.
Once the render is finished..
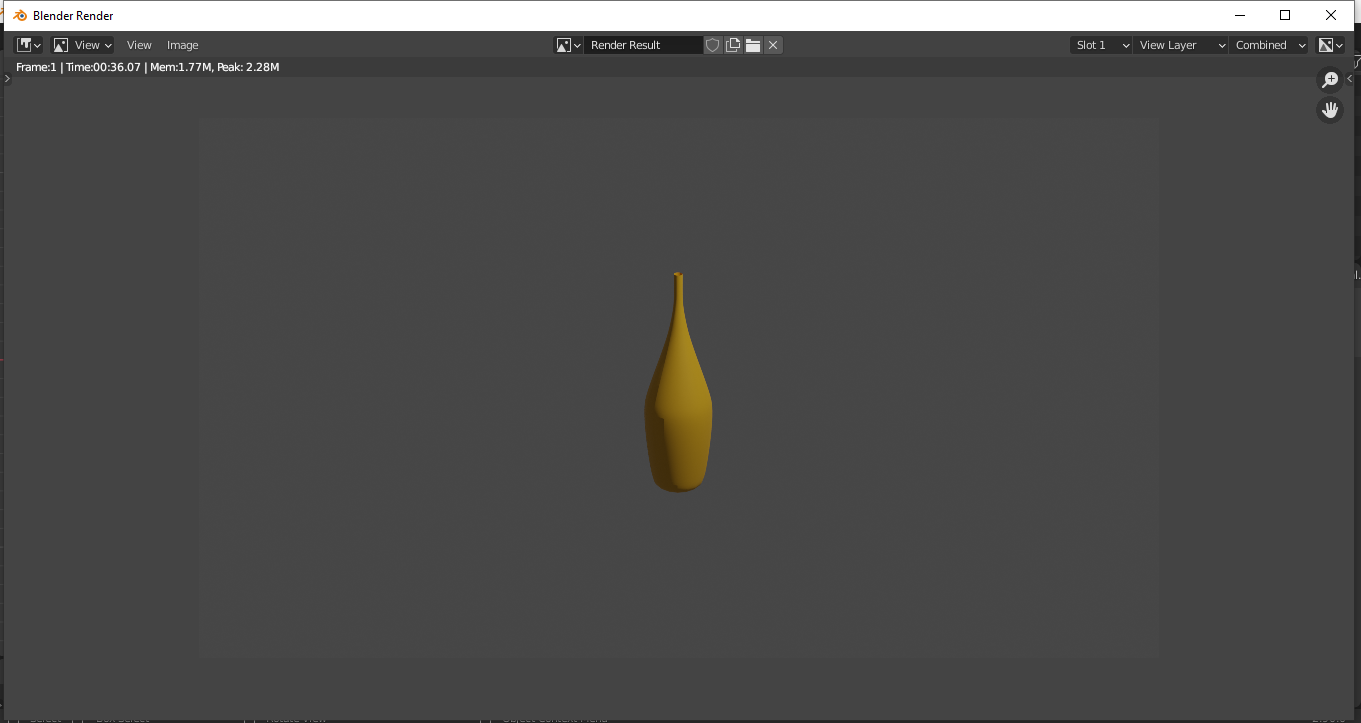
...you can save the image by clicking on image and Save As

This article is to give a basic idea and this can be extended to create complex models. You can go on Youtube and find lots of videos on how to create models in Blender.
-------------------------------------------------------------------------------------------------------------------------------------------------------------------------
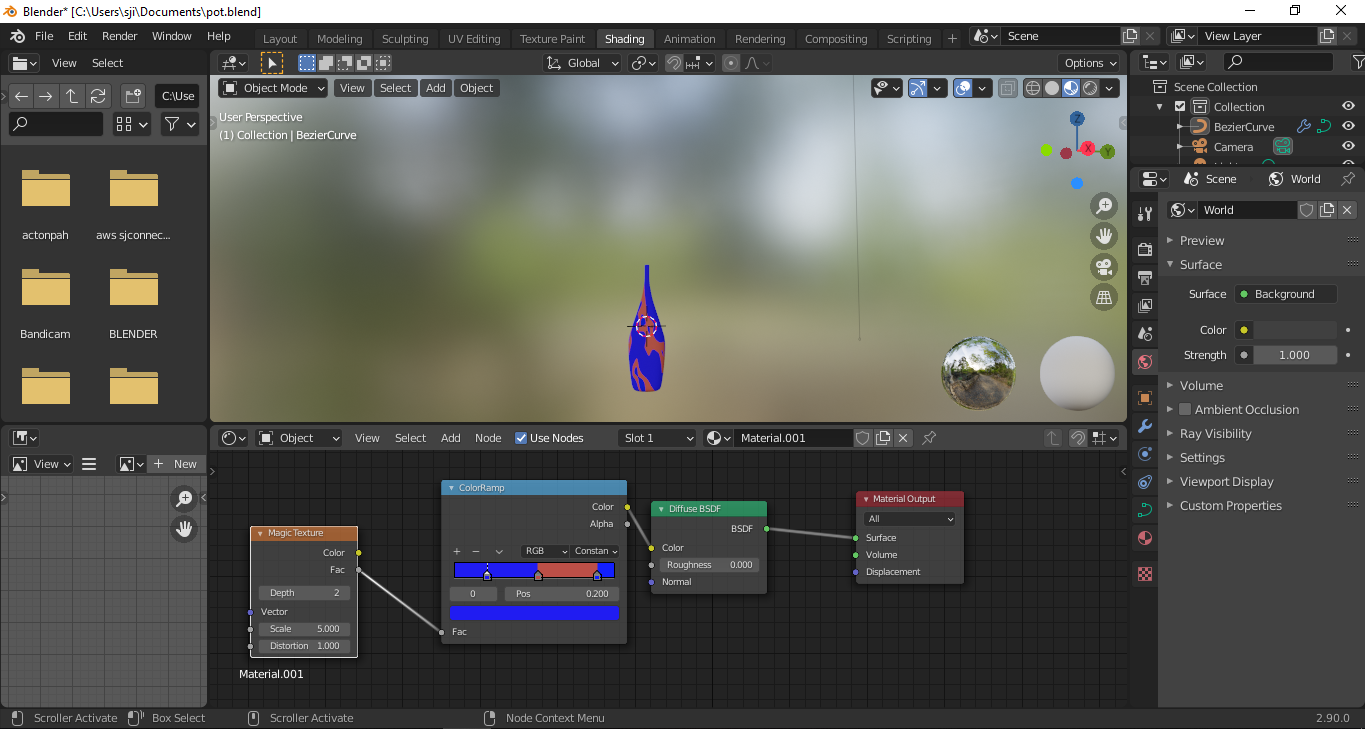
I used the Shader Editor to add some more effects to the object.
To access the Shader Editor, click on the Shading Panel
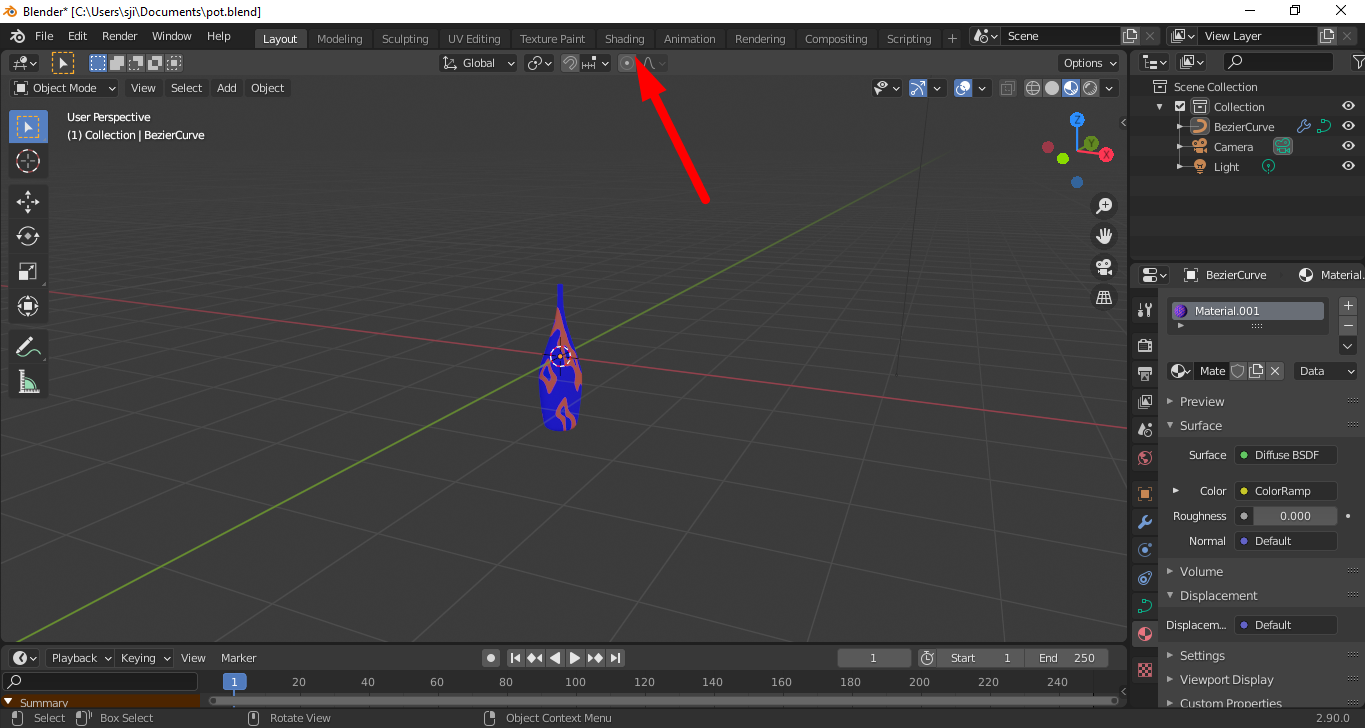
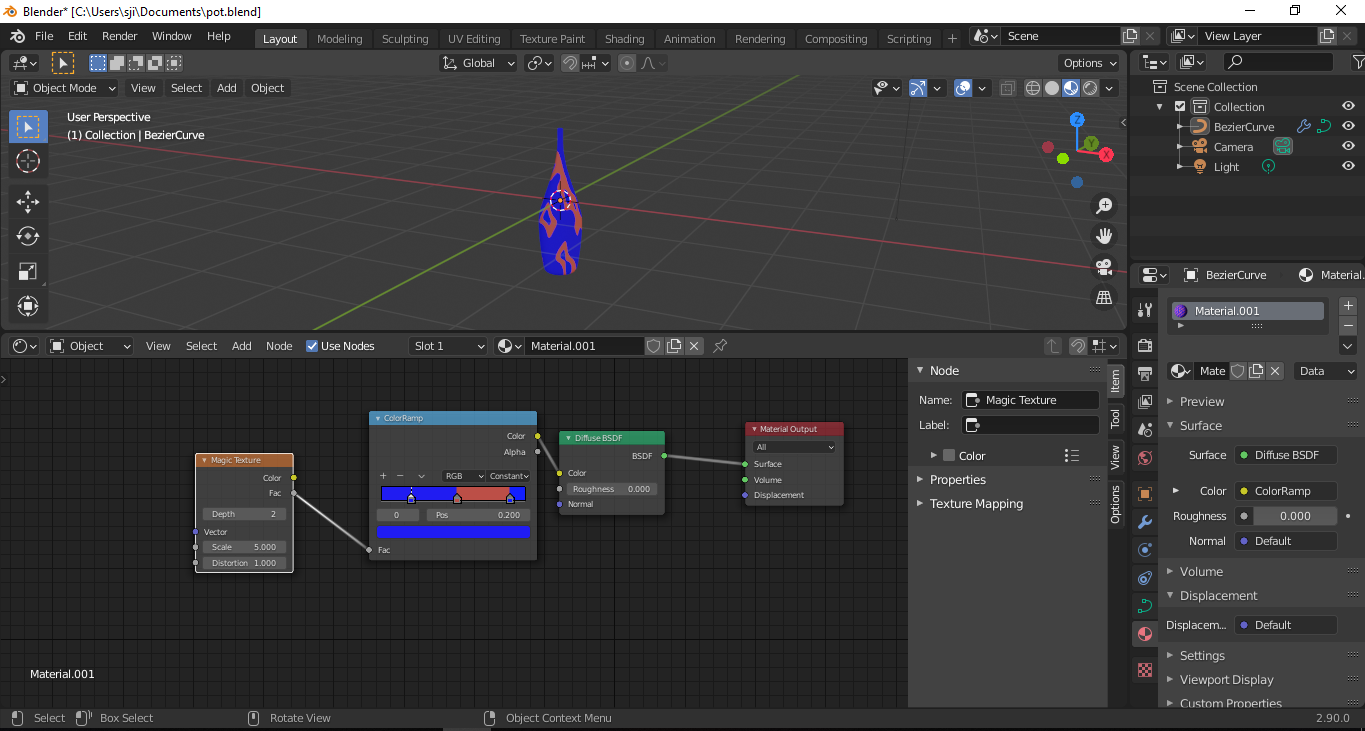
By default, you will see the color added to your object. You can use SHIFT + A to add more nodes.
This article does not go into details on how to properly set up your scene. The lighting and render setting will differ for faster renders and compositing. This article does, however, try to give you a basic idea on how to create a simple model using some of the tools. You can edit the curve to create even more complex shapes/models than vases. We hope that you can learn something from this tutorial.


At the Heart of SJ Innovation: How we Coordinate our International venture

FRIDAY FUN ACTIVITY : A MUST AT EVERY WORKPLACE