Building an Amazon API Gateway is Easier Than You Think! Here's How
Ever since Amazon API gateway was introduced, multiple companies jumped onto its bandwagon and began creating a API, and for good reason!  

Ever since Amazon API gateway was introduced, multiple companies jumped onto its bandwagon and began creating a API, and for good reason!  
Ever since Amazon API gateway was introduced, multiple companies jumped onto its bandwagon and began creating a API, and for good reason!
To begin with, the AWS API gateway made building serverless applications easy and conveniently replaced API servers with a managed serverless solution. The result? Amazon API Gateway usage statistics escalated and there was no going back for building serverless applications.
If you want to take advantage of the many benefits of Amazon API Gateway and build an API but find that getting acquainted with all of its elements is a bit of a task, you are not alone!
In this guide, we’ll help you navigate through everything you need to know about Amazon API gateways and creating an API in AWS easily and within no time!
What is Amazon API gateway all about?
Amazon API Gateway is a fully managed service that makes it easy for developers to create, publish, maintain, monitor, and secure APIs at any scale. Why is a AWS API gateway helpful? It’s because when you build an API, it acts as the "front door" for applications to access data, business logic, or functionality from your backend services. Using AWS API Gateway, you can create RESTful APIs and WebSocket APIs that enable real-time, two-way communication applications. Creating a API Gateway supports containerized and serverless workloads, as well as web applications.
How does it work?
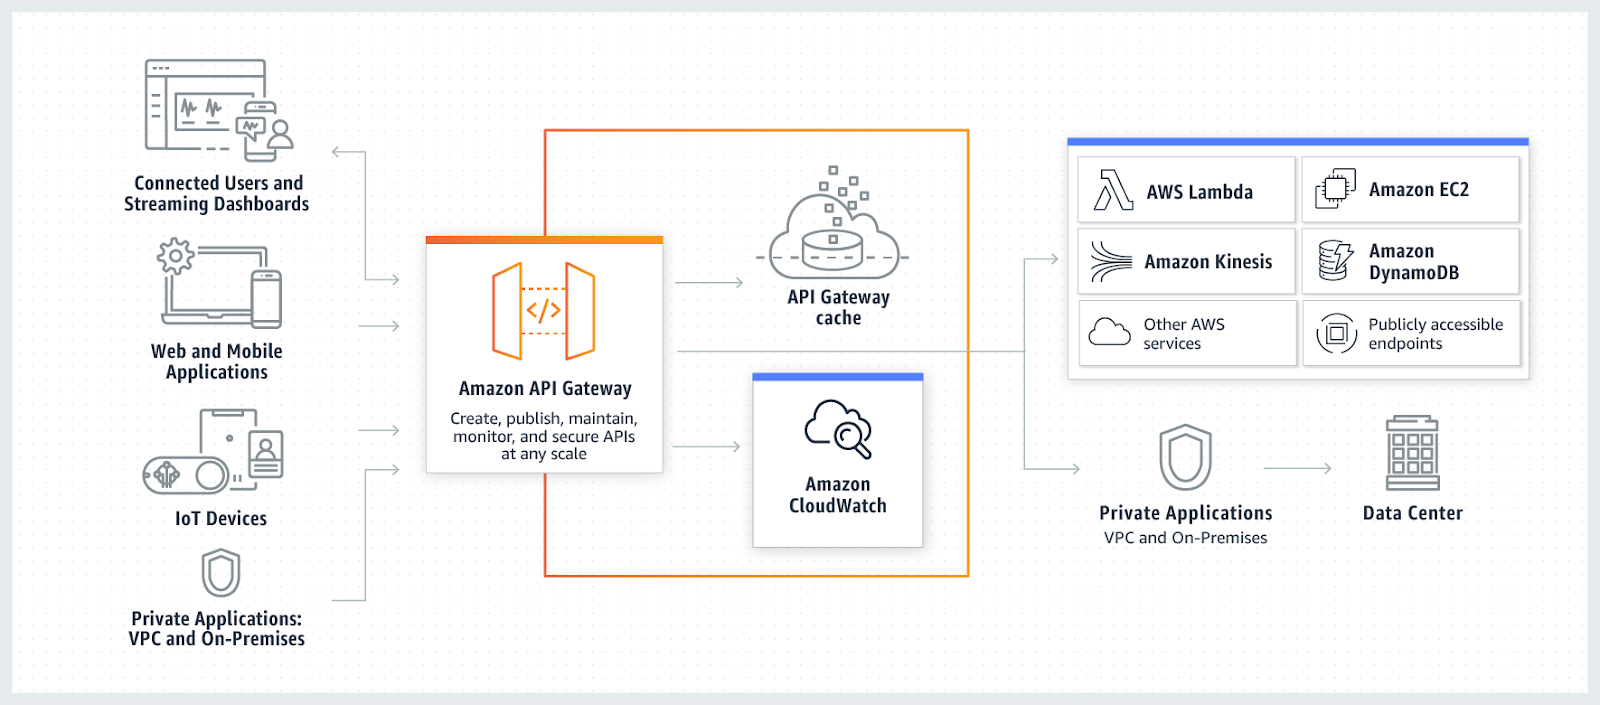
How does the API Gateway make it easy to work with serverless?
You can easily add API Gateway to the application using amplify CLI or studio. It allows the user to integrate the compute layer which includes lambda to process the business logic and computation necessary for the application.
API Types
- RESTful APIs: With AWS API Gateway, you can create RESTful APIs using either HTTP APIs or REST APIs. HTTP APIs are the best way to build APIs that do not require API management features. HTTP APIs are optimized for serverless workloads and HTTP backends—they offer up to 71% cost savings and 60% latency reduction compared to REST APIs from API Gateway. Creating a API Gateway offers REST APIs which prove effective for workloads that require API proxy functionality and API management features in a single solution such as usage plans and API keys.
- WebSocket APIs: With WebSocket APIs, you can build real-time two-way communication applications, such as chat apps and streaming dashboards. An AWS API Gateway maintains a persistent connection to handle message transfer between your backend service and your clients smoothly.
What are the components of API Gateway?
Now, let’s take a look at the various components of the AWS API gateway to better understand this AWS API gateway tutorial.
- Resources: In this segment, we need to create a resource that acts as a pathname ( ‘/products’) for API URL. It also allows us to enable/add HTTP methods which are required to make this API request.To keep the API method open for different requests by default, we have OPTIONS as method. In the actions, we can even deploy the API once our integration is ready.
- Stages: Here, we can create different stages of environment required for the API like dev, staging, and production. Once we deploy the API, we need to select stage and we get the invoke URL which acts as an endpoint.
- Authorizers: This adds the security on who will have access to the APIs which integrate with other AWS services like cognito, lambda to add a security layer.
- Gateway Responses: Sometimes (based on the need of the application), we may have to send custom responses apart from the normal status code for the requests. Gateway responses is a segment that helps in defining all the parameters including status code, response in JSON format, and many others.
- Models: This helps in defining or creating the data structure of a request and response in a way that both become compatible with the service that takes data as input and response as output.
- Resource Policy: In order to restrict the API access within Virtual Private Cloud ( VPC), we make use of this. You can also add IP’s which can access this API.
- Documentation: Documentation with regards to a more improved understanding about the different methods, stages, and how they work can be added here.
- Dashboard: You can review different metrics such as API calls, latency, and many other options available here.
- Settings: When creating a API, you obtain a complete set of updates that you can use which involves API name, endpoint configuration for latency, and many similar options.
- Usage Plans: When you are trying to build an API, you can utilize this option to limit the number of requests. It also comes in handy for add throttling.
How to work with Resources Dashboard and available options?
Now, let’s move ahead to working with resources dashboard and available options when creating a API.
- While starting the API development, it's important to define the pathname that will be part of the endpoint.
- The next step is to add a method if you need to use HTTP method in the request like POST, GET. By default, the method is either set to ANY ( open for all ) or OPTIONS to receive the requests and then process it as shown below:
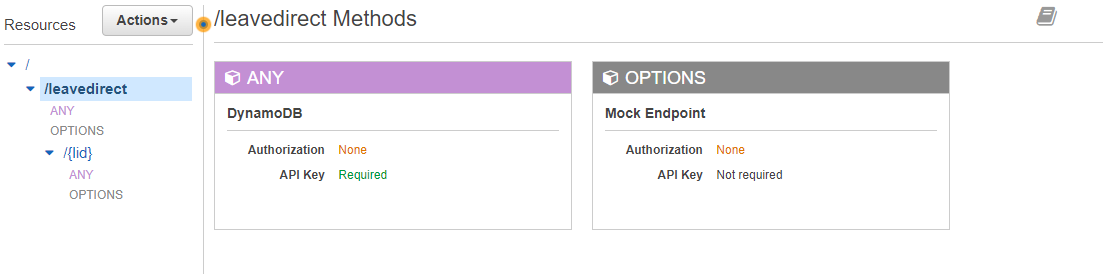
Once the method is selected, you get an option to configure. This includes:
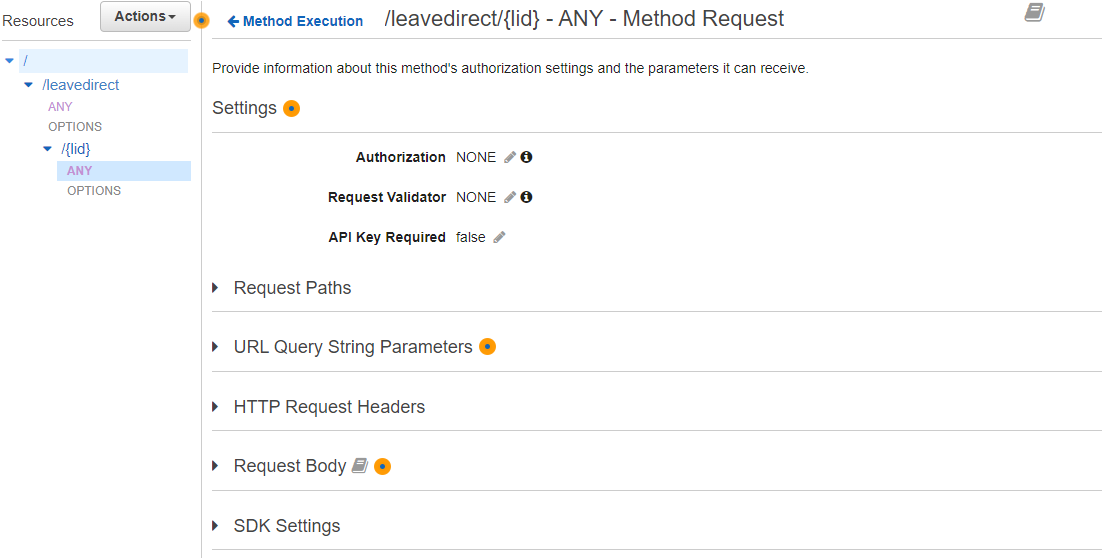
- Method request : Configure headers, authorization, and validator whether request has all required things to process further.
- Integration Request: At this stage, request parameters mapping and AWS service integration takes place. Here, you can define the required permissions using IAM role or use proxy option to pass on the request parameters directly to the AWS service like lambda.
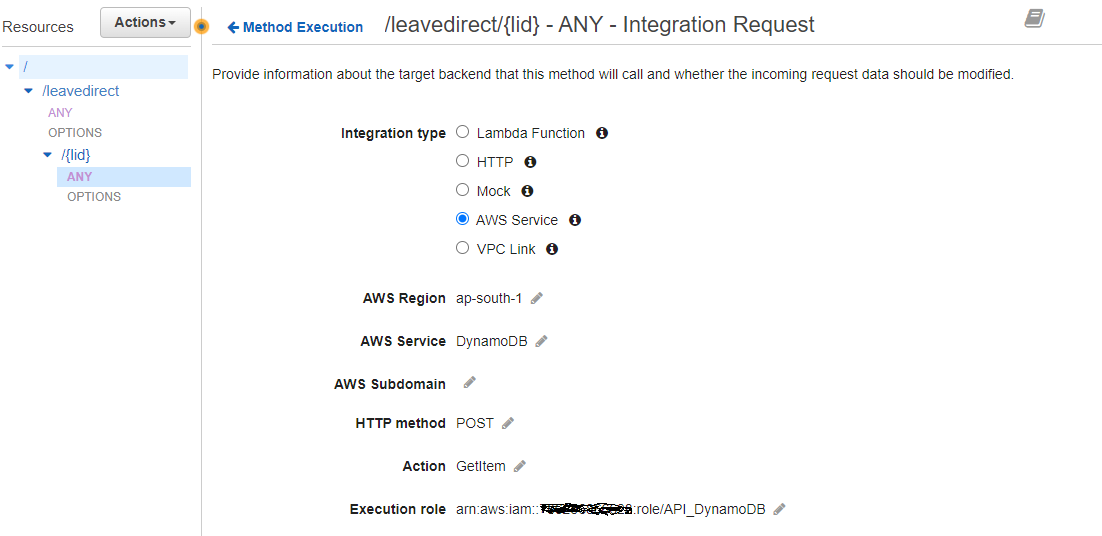
- Integration Response: