Submitting An App To Play Store
After days and months of sacrificing your sleep patterns, you have finally built an app you are proud of and have now reached the climax — you are finally ready

After days and months of sacrificing your sleep patterns, you have finally built an app you are proud of and have now reached the climax — you are finally ready
After days and months of sacrificing your sleep patterns, you have finally built an app you are proud of and have now reached the climax — you are finally ready to publish your app on app store!
Wait! Wondering how to do that? Whether it’s submitting to play store, giving your app for review, or navigating through the process of making it live on the store, the next steps are crucial for your app’s success.
After spending over 4 years in mobile development, I think I'm in a reliable position to assist you guys from being a zero to a hero on how to publish an app on Play Store for free.
We will only be focusing on the Android App Development so, assuming that you have a Google Play Console account already and a generated signed .aab or .apk file, which is an integral part of submitting an Android app, you are nearly at the finish line. Now, all that is left is the final step of submitting your app to Google Play. Go ahead and attach your app's signed file to the Play Store app bundle and publish it.
You can locate these files here:
> App Bundle - myFirstApp/android/app/build/outputs/bundle/app-release.aab
> APK - myFirstApp/android/app/build/outputs/apk/app-release.apk
You can use any of the above, but using a .aab is recommended as App Bundles (.aab) are the publishing format for your app on Google Play, whereas APK (Android Application Package) is the packaging format that eventually will be installed on the app Android device. Let’s have a look at the Google Play Console to app publish on the Play Store, ensuring your app Play Store presence is successful.
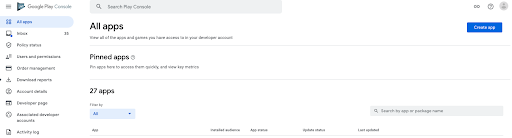
Once you log in to your Google Play Console account, you will land on the above page displaying a list of all the apps you have. Since you are a fresher, you’ll have none. Yes, ZERO.
Create App
Before you move to app publish for free, ensuring you meet all app Play Store requirements, you need to create the app in the best way possible. Clicking on Create app as part of the process how to tutorial for submitting an Android app will lead you here.
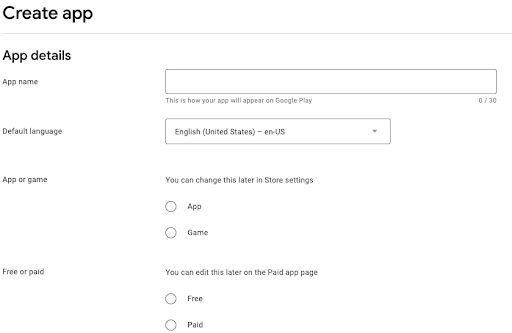
It's essential to follow our tutorial for submitting an Android app meticulously and adhere to the submitting Play Store guide checklist. This step-by-step guidance, including steps requirements for how to submit an app to Google Play, will provide you with the roadmap you need to navigate this critical phase successfully.
The first part of creating an app is adding details of your app.
- App Name: Unique app name which has never been used before for any other app.
- Default Language: Will be auto-selected as English. But, you can change it.
- App or Game: Define if the app is a game or a normal app.
- Free or Paid: Believe me, When it comes to thinking about how much does it cost to publish an app on Play Store, it’s best to give it for free.
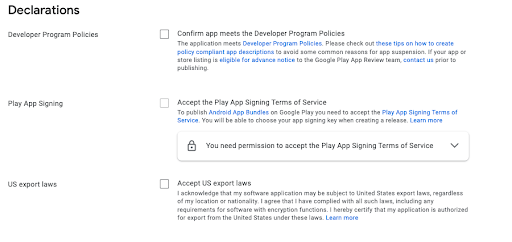
It’s mandatory to check the above to proceed further!
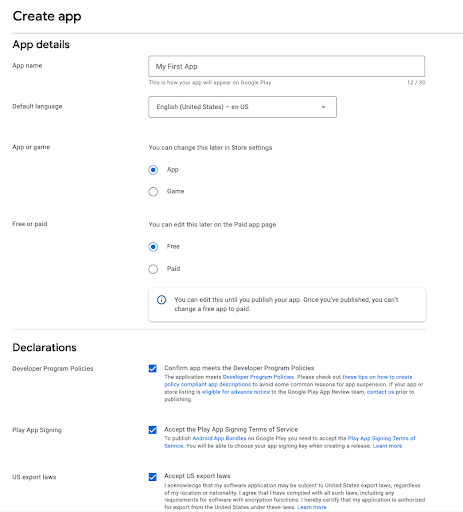
So, if you want to test your app before releasing it, you can go ahead and publish it as an internal app under internal beta testing. But, now that we planned on publishing it LIVE, let’s just focus on that.
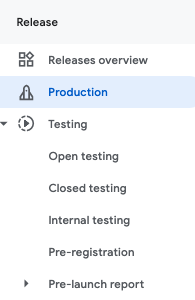
Click on Production under the Release types which you can access from the sidebar.
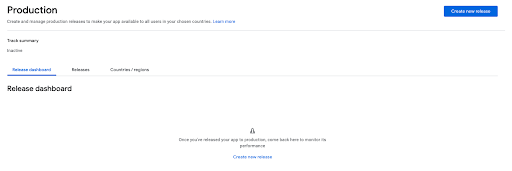
First, you’ll need to create a new release and choose whether or not you want to use the Google Play app signing. Letting the releases be signed by Google Play is recommended.
Click on upload to select the .aab file from your local drive. There will be no apps under the library as you have not yet uploaded any app bundles but, once you add a new bundle every time it will list all bundles under the library and you’ll directly get an option to select from the library.
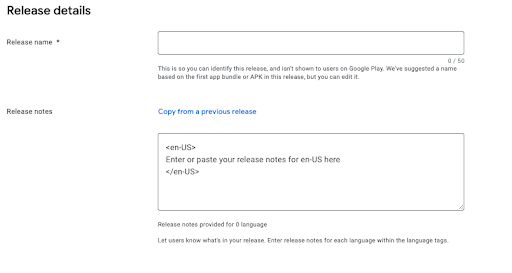
When you go to enlist the steps to publish the android application, don't forget to name your release, as it will define the uniqueness of the app release versions on the store. Additionally, you can also add release notes to specify what changes or new updates you have made to your app so the general public is aware of the updates on your new release.
Hit the Review button and save it for later as we’ll now add more details about the app to make a great first impression and help users find and engage with your app through your store listing.
Store Listing
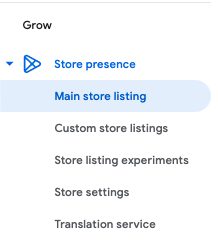
Edit information like your app’s name, icon, description, screenshots, and video to increase discoverability and drive downloads.
Let’s proceed.
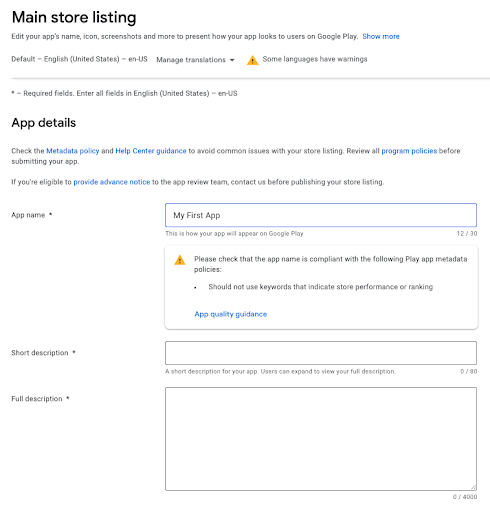
Make sure to use appropriate keywords in the above to increase the chances of your app showing up in searches. Enter app details such as a short description of the app and a more extended description.
The short description is the text users will see when looking at your app’s Store Listing from the Google Play Store.
The extended description of your app should include enticing app features and what users can accomplish. This description appears in the app store and cannot be longer than 4000 characters.
Graphics & Screenshots
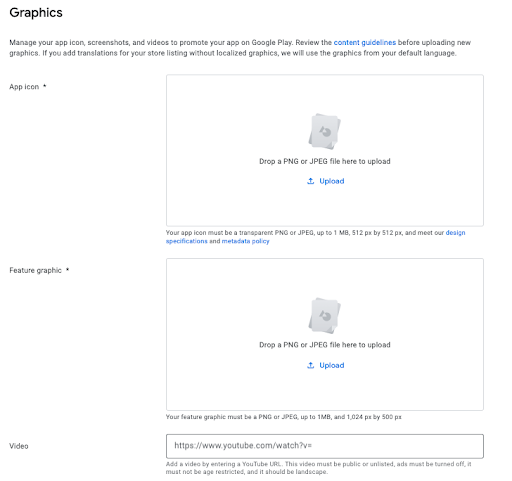
To make your app look cooler on the store, it’s very important to add crystal clear and perfect app icons and screenshots. This will also make the app look professional and genuine. The app icon and screenshots will convey the story about your app along with the originality of what it promises to deliver to the audience.
I have been using https://appicon.co/ for generating good-quality app icons.
You can also add a video by entering a YouTube URL. This video must be in landscape mode along with strictly public or unlisted, ads must be turned off, and it must not be age-restricted.
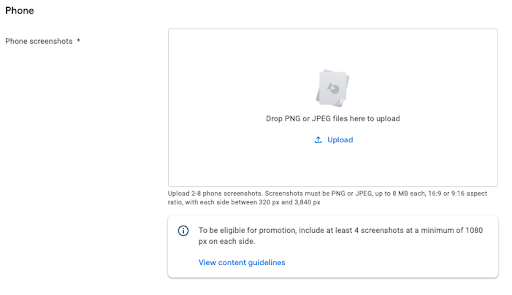
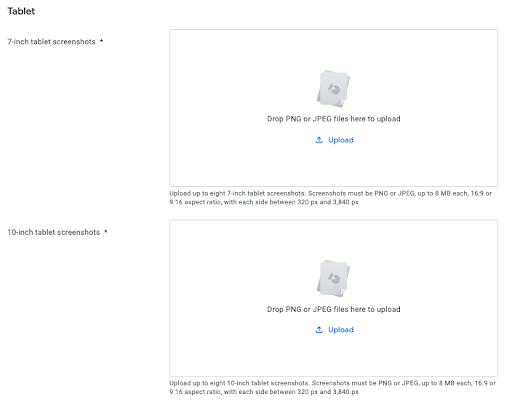
With this, the next thing to add is 3 types of screenshots:
- Phone screenshot
- 7-inch tablet screenshot
- 10-inch tablet screenshot
Better to read the