Lambda trigger on DynamoDB Table events in CDK
The era of serverless architecture is fascinating and automation and scalability go hand in glove. What does this mean in the world of Lambda Trigger on DynamoDB Table Events in CDK? In this comprehensive guide, we will discover DynamoDB event triggering Lambda in CDK. How this powerful combination allows you to effortlessly automate your event-driven workflows and unlock new levels of efficiency and scalability. Whether you're a seasoned developer or just getting started, this article will equip you with the knowledge and tools to leverage the true potential of serverless computing.
In this article, we will be setting up a lambda and a DynamoDB table, and once a record is inserted into the table, it will automatically trigger another lambda, which will send an email to the user. In short, everything you need to know about Lambda trigger on DynamoDB events in CDK.
What is CDK?
CDK is a tool by AWS to create IAC (infrastructure as code), which allows you to write code for resources on AWS, and when deployed to AWS, it will create those resources. This helps to quickly deploy and create required resources on any AWS account within a matter of minutes and also saves time that otherwise would have been spent manually creating the resources.
Nowadays, you might have heard of the term ‘serverless’, which means you just have to bring your code for your application, and the cloud provider will take care of everything else, from the server to setting up the environment for your app to run.
In the case of AWS, Lambda is the service that offers to host the code, and the rest is handled by AWS. DynamoDB is a good candidate to pair with Lambda because it requires the least configuration and can be set up within minutes. It is a NoSQL DB similar to MongoDB,
So let’s get started!
To start 1st install the AWS CLI and AWS CDK CLI for seamless integration with AWS Lambda and DynamoDB. Both the AWS CLI and AWS CDK CLI are separate tools that are essential for this integration. We will need both of these to proceed with the setup.
To install AWS CLI, simply follow the instructions on this page:
https://docs.aws.amazon.com/cli/latest/userguide/getting-started-install.html
To install AWS CDK CLI and explore its powerful capabilities, including DynamoDB event triggering Lambda in CDK, follow the instructions provided on this page.
https://docs.aws.amazon.com/cdk/v2/guide/cli.html
Now we can start with the setup.
- Create a Folder with the name of the project, when we run the CDK project setup command it will take the name of the folder as project name.
- We will be using the typescript template to setup the project open terminal inside of the folder and run this command
cdk init app --language typescript
This will create and set up the files and folders required for the project.
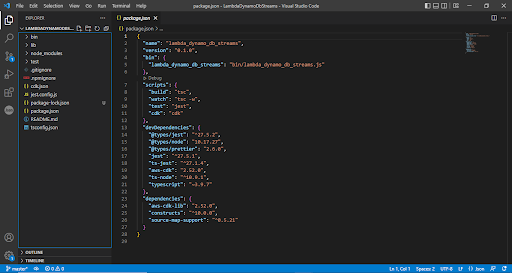
Once this is done, we can start with importing the required libraries. To get started, go to the "lib" folder where you will find a file with the project name. This file will be our focus for the next steps. In my case, the file name is:
lib\lambda_dynamo_db_streams-stack.ts
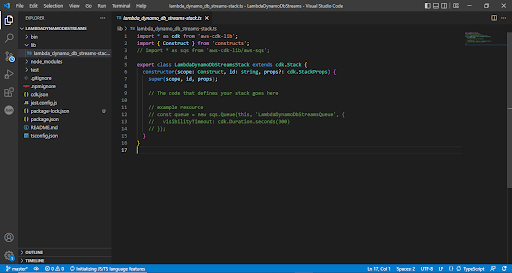
We will need DynamoDB, Lambda and API gateway
Add the following line to import the constructs required for our project.
import * as Lambda from 'aws-cdk-lib/aws-lambda';
import * as DynamoDB from "aws-cdk-lib/aws-dynamodb";
import * as ApiGateway from "aws-cdk-lib/aws-apigateway";
Now to create a Table in DynamoDB add the following code in the constructor
const table = new DynamoDB.Table(this,"events-table",{
partitionKey:{
name:"PK",
type:DynamoDB.AttributeType.STRING
},
sortKey:{
name:"SK",
type:DynamoDB.AttributeType.NUMBER
},
tableName:"Events-table",
stream:DynamoDB.StreamViewType.NEW_IMAGE
})
This code will create a new table. Let us go through the DynamoDB.Table function.
The first parameter is this keyword, which points to the current stack.
The nextone “events-table” is the ID of the table, which it will use to uniquely identify the resource on stack. CDK will use this as a table name if it is not provided in the third parameter.
The last parameter for the function is the object with the setting for the tables,
Here we have specify the table name , partitionKey and sortKey for the table ,
And the last property that is required for it to trigger the Lambda function is the streams property
The stream tells how the data should be written to the stream, and the stream views take the following values.
- KEYS_ONLY - Only the key attributes of the modified item are written to the stream.
- NEW_IMAGE - The entire item, as it appears after it was modified, is written to the stream.
- OLD_IMAGE - The entire item, as it appeared before it was modified, is written to the stream.
- NEW_AND_OLD_IMAGES - Both the new and the old item images of the item are written to the stream.
Now we will set up the API gateway and the lambda functions. API gateway will be used to access all the lambda functions and pass the data.
const api = new ApiGateway.LambdaRestApi(this,"demo-api",{
proxy:false,
handler:saveData
})
api.root.addMethod("POST");
}
Next is the function, which will be linked to the API gateway and process the request data.
const saveData = new Lambda.Function(this,"handledata",{
functionName:"demo-handledata",
runtime:Lambda.Runtime.NODEJS_14_X,
code:Lambda.Code.fromAsset("Lambda/save-data"),
retryAttempts:2,
timeout:cdk.Duration.seconds(60),
handler:"index.handler",
environment: {
'demo_table_name': table.tableName,
},
})
table.grantReadWriteData(saveData);
The above code creates a lambda function and also gives it basic permission to read or write data to it. I will create logic for the lambda in a separate file. For this, we need to create a separate folder and create the required file.
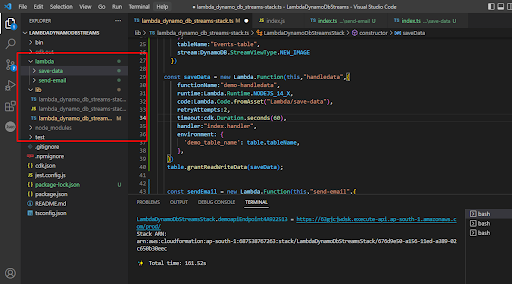
Now we need to add the logic for the function. The code is simple; it takes the data from the API gateway and saves the data to DynamoDB. I have hardcoded the region, but you can pass it as an env variable to the ladmba.
let AWS = require("aws-sdk");
const DEMO_TABLE = process.env.demo_table_name;
const documentClient = new AWS.DynamoDB.DocumentClient({region:"ap-south-1"})
exports.handler = async (event: any, context: any, callback: any) => {
let _body = JSON.parse(event.body);
const response:boolean = await saveDataToTable(_body);
if(response){
return {
statusCode: 200,
body: JSON.stringify({"message":"data saved successfully"}),
headers: {
'Content-Type': 'application/json'
}
};
}else{
return {
statusCode: 403,
body: JSON.stringify({"message":"some error occured"}),
headers: {
'Content-Type': 'application/json'
}
};
}
}
const saveDataToTable = async (insertData: any) => {
const params = {
TableName: DEMO_TABLE,
Item: {
...insertData,
created: +Date.now(),
}
};
try {
await documentClient.put(params).promise();
return true;
} catch (e) {
console.log(e);
return false;
}
} //function end
Next, we will add the function that will be triggered when the data is saved in DynamoDB.
For this, we will add a lambda function and specify the event source. For this, we will specify DynamoDB as our event source.
const sendEmail = new Lambda.Function(this,"send-email",{
functionName:"demo-send-email",
runtime:Lambda.Runtime.NODEJS_14_X,
code:Lambda.Code.fromAsset("Lambda/send-email"),
retryAttempts:2,
timeout:cdk.Duration.seconds(60),
handler:"index.handler",
environment: {
'demo_table_name': table.tableName,
"SENDGRID_API_KEY":SENDGRID_API_KEY
},
})
sendEmail.addEventSource(new DynamoEventSource(table,{
startingPosition: Lambda.StartingPosition.LATEST,
retryAttempts:2,
batchSize:10
}))
The event function takes the table and from where to start the stream.
The below code will specify where to start reading the data from
startingPosition: Lambda.StartingPosition.LATEST,
This code will specify the retry attempts and the batch size.
retryAttempts:2,
batchSize:10
Next is the logic for the lambda, create a new file in the lambda folder and add the below logic.
let _AWS = require("aws-sdk");
const sgMail = require('@sendgrid/mail');
sgMail.setApiKey(process.env.SENDGRID_API_KEY)
exports.handler = async (event: any, context: any, callback: any) => {
const data = event.Records[0];
if(data.eventName != 'INSERT' && data.eventSource != 'aws:dynamodb'){
return;
}
const emailTo = data["dynamodb"]['NewImage']['email']['S'];
let mailOptions = {
from: '[email protected]',
to: emailTo,
subject: 'Your email is here',
html: "<h3>This is a test email</h3>"
};
sgMail
.send(mailOptions)
.then(() => {
console.log('Email sent')
})
.catch((error:any) => {
console.error(error)
})
}
Here we will be reading the data in the event stream and sending the email. We are using NodeMailer and SendGrid for sending the email.
Once that is done we need to run ”tsc” command, this command is only required if you are using typescript, is will convert the TS file to JS
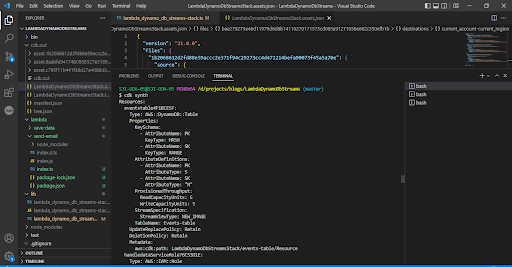
Once done, we can run the CDK synth command, which will create a cloudformation template for our stack.
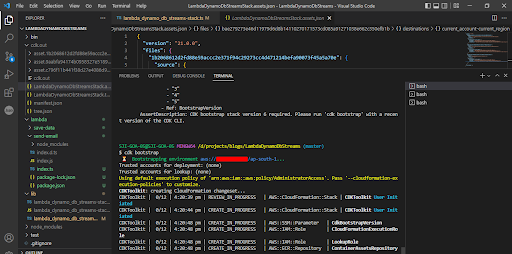
If you are deploying it for the first time, we will need to run the CDK bootstrap command. To bootstrap the environment.
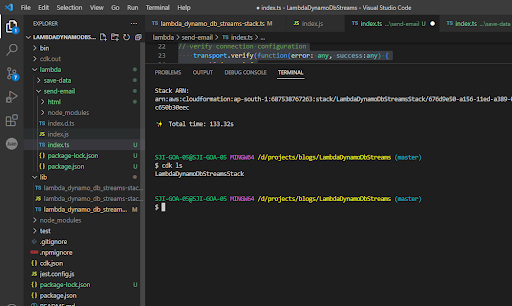
Now run the CDK ls command, which will list out the stacks available. We will need the stack name to deploy our project to AWS.
Now we can run the CDK deploy command with the stack name, and it will deploy our stack to AWS.
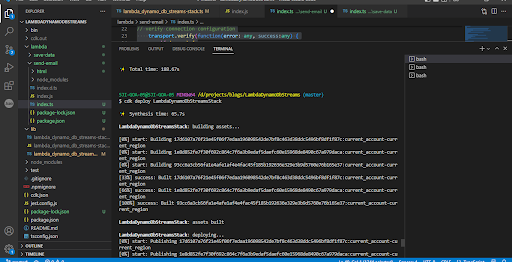
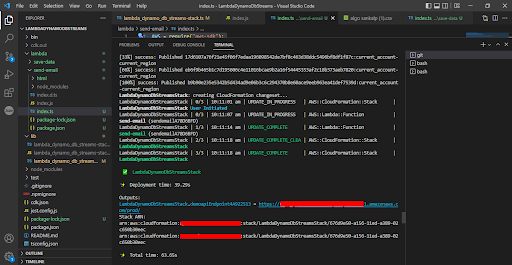
Once done, it will also give us the API gateway link, which we can use to make the request.
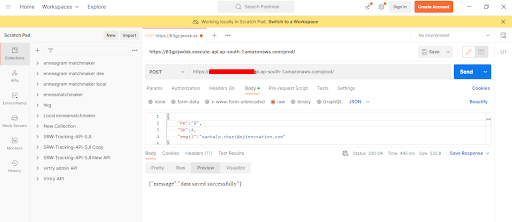
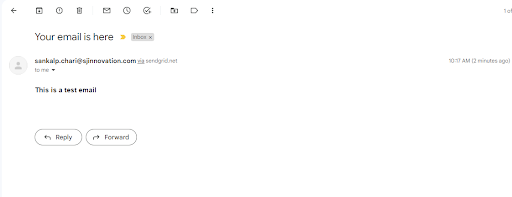
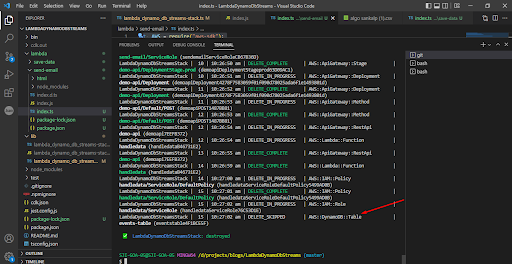
Once done, we can delete the resources if they are not required. To delete all the resources, we can run the CDK destroy command.

Give it confirmation, and it will delete all the resources. Some of the resources, like the DynamoDB table, you will have to manually delete.
Github Repo Link :- https://github.com/SankalpChari52/dymanodb-events.git
So there you go! With a DynamoDB stream, we can invoke any lambda and trigger it to perform a task. Additionally, by leveraging the power of the AWS Cloud Development Kit (CDK), we can simplify the process of setting up the Lambda trigger on DynamoDB events.
By utilizing the CDK, you can easily set up the lambda trigger on DynamoDB events. This enables you to automate processes, such as data synchronization, data transformations, or triggering downstream workflows based on changes in the DynamoDB table. To learn more, get in touch with our AWS experts today!
Be productive using tools and techniques.

What Makes You Unique In A Job Interview
