Magento 2 Custom Module Development

Magento module development services are all the rage today! After all, Magento development services is one of the most powerful and widely used e-commerce CMS. Since it's specifically built for e-commerce, it includes almost all the important features that are required to manage your online store.
Besides utilizing the potential of Magento module development services, did you know that you can also create a winning lead magnet with Magento on AWS. Watch the video:
Magento 2 comes with a wide range of features and you can maximize on its potential with Magento module development services, but if those features don't seem to fulfill all of your requirements, then you can always add more custom features to it.
I will try to explain the Magento 2 Custom Module development as detailed as possible.
Let's first understand Magento module development services and what the module will do. We are going to develop a custom module, specializing in Magento module development services, that will round off the total cart price, i.e., if a user has added 125.5 USD worth of products in the cart, then it would get rounded off to 126 USD.
Given below is the amount that we will be rounding off.
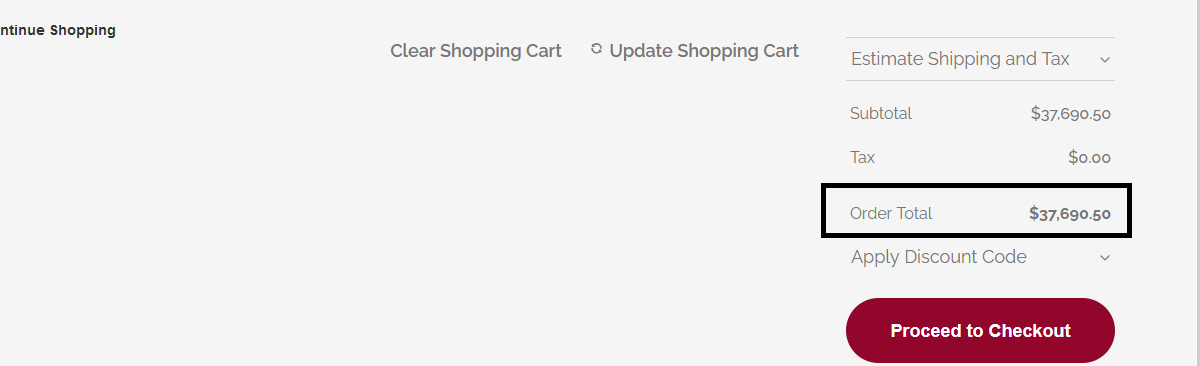
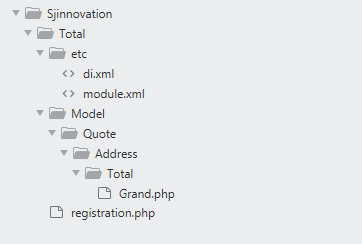
In order to build this module, let’s first understand the folder structure for building a custom module. If you're looking for help with this or with Magento module development services, our team of experts can help.
App -> Code -> Vendor Name -> Module Name
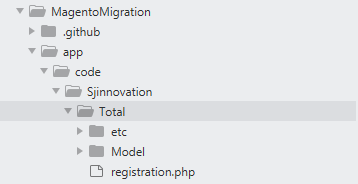
Here, the vendor is SJ Innovation and Total is the Module name. Please ignore the other files and folders for now. We will be exploring them in detail as we progress.
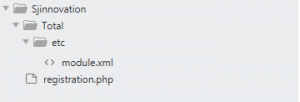
In order to create and register a custom module, we have to create 2 files
- registration.php ( inside Modules root folder )
- module.xml ( inside the etc folder )
1. Create a file named registration.php in the modules root director

Now open the file and copy given below code
<?php
\Magento\Framework\Component\ComponentRegistrar::register(
\Magento\Framework\Component\ComponentRegistrar::MODULE,
'Sjinnovation_Total',
__DIR__
);
Here Sjinnovation is the name of the vendor and Total is the name of the module.
2. Now create a file named module.xml in etc folder
Copy the given content below in the module.xml file
<?xml version="1.0"?>
<config xmlns:xsi="http://www.w3.org/2001/XMLSchema-instance" xsi:noNamespaceSchemaLocation="urn:magento:framework:Module/etc/module.xsd">
<module name="Sjinnovation_Total" setup_version="2.2.0">
</module>
</config>
Here "Sjinnovation_Total" is the name of the custom module
Now you have to run the command given below.
php bin/magento module:status

As soon as you run this command, you will be able to see your custom module getting listed in Magento. This means that our module, which offers Magento module development services, is registered, but if you notice that it's still coming on the disabled list, that means that our module is registered, but not yet enabled in the system. We will be enabling it soon.
But first, let's move onto the next step, i.e to write the logic which will round off the total cart amount.
In order to achieve this, we have to override Vendor\Magento\Quote\Model\Quote\Address\Total\Grand.php which calculates the Cart’s total amount.
Please note that this is the core file of Magento 2, and we will be overriding it in our custom module.
Create a file named di.xml in etc folder
Copy the content given below in di.xml
<?xml version="1.0"?>
<config xmlns:xsi="http://www.w3.org/2001/XMLSchema-instance" xsi:noNamespaceSchemaLocation="urn:magento:framework:ObjectManager/etc/config.xsd">
<preference for="Magento\Quote\Model\Quote\Address\Total\Grand" type="Sjinnovation\Total\Model\Quote\Address\Total\Grand" />
</config>
In this file, I have specified 2 things in preference
- Which file should be overridden ( for="Magento\Quote\Model\Quote\Address\Total\Grand" )
- The file which will be overriding it ( type="Sjinnovation\Total\Model\Quote\Address\Total\Grand" )
Now, since we are overriding a model, we have to create a folder named "Model" and then follow the folder structure in the core module.
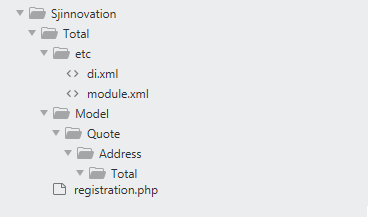
Now create a file named Grand.php (Refer fig for the location of the file)
Copy the content given below in Grand.php
<?php
namespace Sjinnovation\Total\Model\Quote\Address\Total;
class Grand extends \Magento\Quote\Model\Quote\Address\Total\Grand
{
public function collect(
\Magento\Quote\Model\Quote $quote,
\Magento\Quote\Api\Data\ShippingAssignmentInterface $shippingAssignment,
\Magento\Quote\Model\Quote\Address\Total $total
) {
$grandTotal = $total->getGrandTotal();
$baseGrandTotal = $total->getBaseGrandTotal();
$totals = array_sum($total->getAllTotalAmounts());
$baseTotals = array_sum($total->getAllBaseTotalAmounts());
/* code edited here */
$totalCartAmount = round($grandTotal + $totals);
$total->setGrandTotal($totalCartAmount);
/* code edit end */
$total->setBaseGrandTotal($baseGrandTotal + $baseTotals);
return $this;
}
}
Here in the namespace, the proper folder structure should be followed. Also, if you notice, I have extended my "Grand" class with Magento\Quote\Model\Quote\Address\Total\Grand. This is to ensure that I inherit all the methods and variables of the core Grand class.
If you don't do that, then some of the features of the core module, including Magento module development services, will not work, since other methods will not be present in the newly overridden class.
Now, I have just rounded off the cart value and then assigned it as the grand total.
With that our Custom module development is done. Now we have to enable it.
For that, run the commands given below in exact sequence
php bin/magento module:enable Sjinnovation_Total
This command will enable your custom module.
php bin/magento setup:upgrade
php bin/magento setup:di:compile
php bin/magento setup:static-content:deploy -f
php bin/magento cache:clean
php bin/magento cache:flush
Now check your Cart Total
And with that, you have successfully created and integrated a custom module in Magento development services. Here is the link to my Custom modules git repository:
https://github.com/akshaynaik18bc/Sjinnovation
Now Here are some FAQs:
1. What is Magento 2 Custom Module Development?
Magento 2 Custom Module Development refers to the process of creating a custom module in Magento 2, which allows you to add or modify features according to your specific requirements. Magento module development services ensures that you have the flexibility to enhance your Magento 2 store with unique functionalities tailored to your needs.
2. How do I register a custom module in Magento 2?
To register a custom module in Magento 2 and avail Magento module development services, you need to create two files: registration.php and module.xml. The registration.php file is placed in the module's root directory and contains code to register the module. The module.xml file is placed in the etc folder and provides information about the module, such as its name and version.
3. How can I override a core file in Magento 2 using a custom module?
To override a core file in Magento 2 using a custom module, including Magento module development services, you need to create a di.xml file in the etc folder of your module. In the di.xml file, you specify which core file you want to override and provide the location of the file in your custom module. This allows you to extend and modify the functionality of the core file without directly modifying the core code.
4. What is the purpose of the Grand.php file in the custom module?
The Grand.php file in the custom module is used for Magento module development services to override the Magento\Quote\Model\Quote\Address\Total\Grand class, which is responsible for calculating the cart's total amount. By extending this class in your custom module, you can add custom logic or modify the calculations performed when calculating the grand total.
5. How do I enable and integrate a custom module in Magento 2?
To enable and integrate a custom module in Magento 2, you can rely on our Magento module development services. You need to run a series of commands in the command line. First, enable the module using the php bin/magento module:enable command, followed by running the necessary setup commands (setup:upgrade, setup:di:compile, setup:static-content:deploy). Finally, clear the cache using cache:clean and cache:flush commands. Once these steps are completed, the custom module will be enabled and integrated into your Magento 2 installation.
Happy Coding.
Request a Quote now to get a complete range of Magento module development services


At the Heart of SJ Innovation: How we Coordinate our International venture

FRIDAY FUN ACTIVITY : A MUST AT EVERY WORKPLACE